 Welcome back to the second installment of our two-part series on preserving your family history with web-based genealogy tools. In Part 1, we explored my Dad’s genealogy journey, the challenges he encountered, and the solution we found to securely store his family tree research. We also discussed the importance of digital preservation and data security when it comes to such valuable information. If you missed Part 1, I recommend checking it out to get up to speed.
In this second part, we’ll roll up our sleeves and dive into the practical aspects. We’re going to walk through the step-by-step process of installing and configuring the web-based genealogy program, ensuring that your family history is not only preserved but also easily accessible and shareable. So, whether you’re continuing from Part 1 or just joining us now, let’s get started on this exciting journey of digital family history preservation.
For the program we are going to use to share and document our family tree, it is called webtrees.
Webtrees is a fantastic piece of open-source software. It’s now my go-to tool for managing my family history, and the best part? It does not cost you a dime! All you need is a website that runs PHP and MySQL, and you’re good to go. With our install of our SWAG containers .. we have both!
Here’s the magic: webtrees effortlessly handles standard GEDCOM files, making it compatible with all the major desktop applications. It’s like the family tree wizard you’ve been waiting for.
But it’s not just about compatibility; webtrees is all about efficiency and effectiveness. It uses a smart mix of third-party tools, clever design techniques, and open standards to make your family history journey as smooth as can be.
here is how we install it. Navigating to the webtrees installation section of their site: https://webtrees.net/install/ you are given the option from a couple different files based on your PHP version. as of this Blog, the version of PHP in our SWAG instance is 8.1. So get the higher version.
Step 1: Install Unzip
First, let’s make sure you have unzip installed. Again, making sure you are still connected via putty to your Oracle Ubuntu VM rung the following on the terminal prompt sudo apt install unzip if not installed, it will install it for you.
Step 2: Download and unzip webtrees
We are going to do all downloads on your Virtual Machine… so no worries on bad scary code or anything else… it’s not your server! haha!
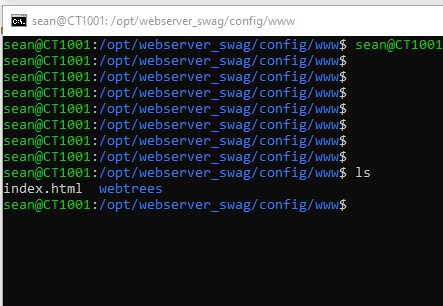
Make sure you are in the proper directory /opt/webserver_swag/config/www if you you got turned around you can just get back to the top level by entering cd / then you can “cd” into the correct location. Download with wget:
The zip file should now be removed
Now run ls in the terminal and you should just see the index file and webtrees folder:
 ALMOST DONE .. Promise!
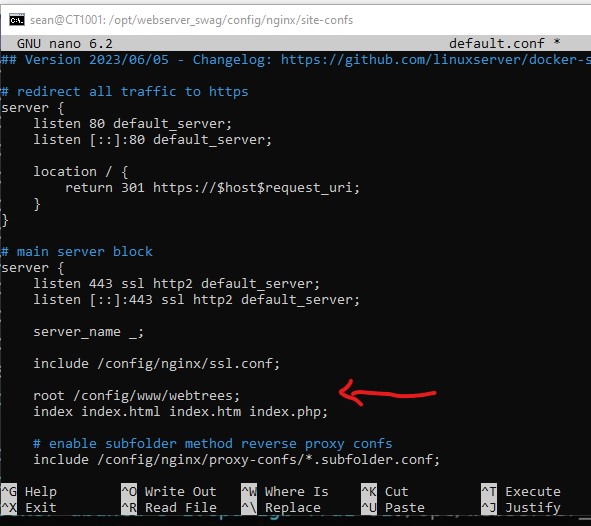
Step 3: Pointing NGNIX to the webtrees folder
to quickly navigate to the file we need to edit, do the following from the current directory you are in. I am assuming you are in the /opt/webserver_swag/config/www directory still.
This will put you in the default.conf file and we need to make a change to the root folder directory listing.
 This will put you in the default.conf file and we need to make a change to the root folder directory listing.
Step 5: Navigate to Your Webtrees Site!
Now you should be able to navigate to your webtrees site using the duckDNS domain URL you created. If everything went as planned you should see a setup screen:
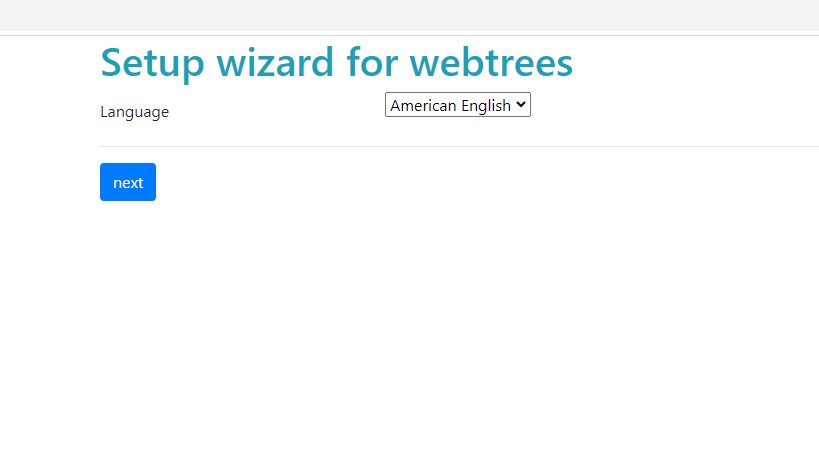 Pick your appropriate language, the click next. You will be taken to the connection to database server screen:
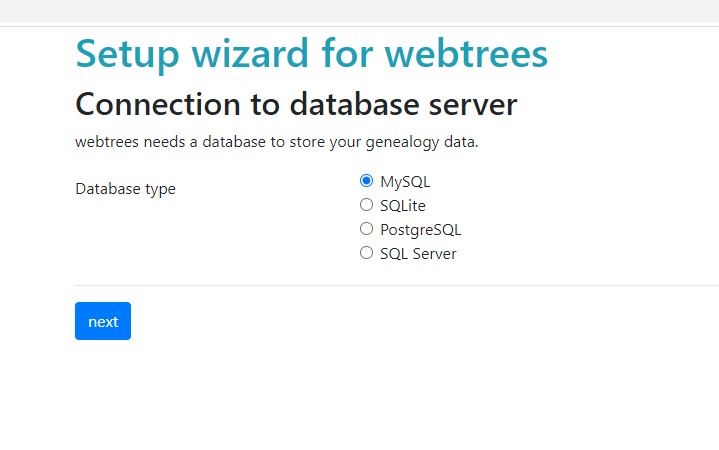
You want to select MySQL. MariaDB is h is a fork of MySQL and is designed to be highly compatible with MySQL, you should select “MySQL” as the database type when configuring webtrees with our particular set up. The click next to be taken to the Database Connection configuration screen:
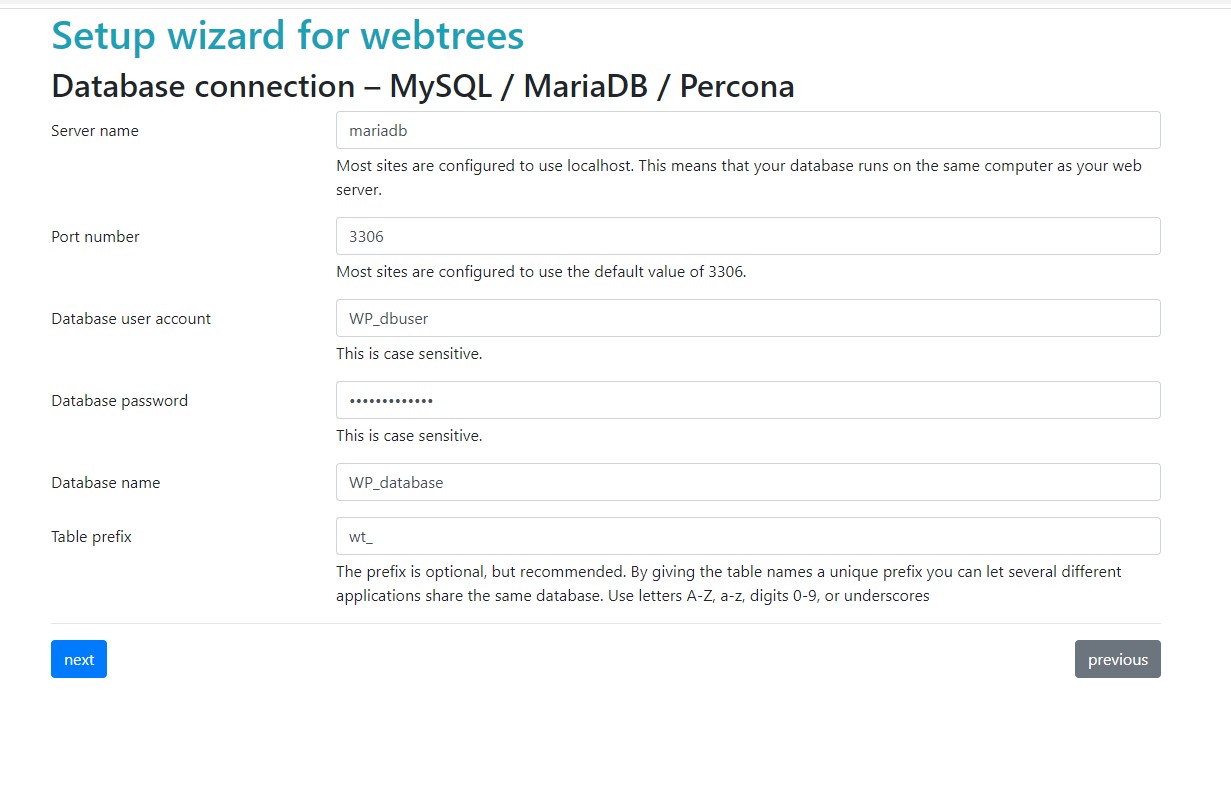 Ok.. on this screen, I was stuck for a long time because I was using “localhost” in the server name per the instructions here and most of what I saw on line. I THINK because we have MariaDB running in a container, that name was causing it to fail. SO, for your own sanity, make the name: mariadb, configure to the default port of 3306 and use the username, password, and database name you set up in your yml file. if you used ALL of the default I gave you then you can scroll up and copy paste! Click next after it looks similar to the above with your information and you will be taken to the set up for administrator account:

When you are setting up your admin account, it is fairly straight forward. I will say though that use an email address where you are ok with getting email reminders and notifications on. You have the ability to configure webtrees to send out notifications by using their SMTP server. GMAIL is easiest to configure with this feature later. Again, when you are done on this screen, click next to go to the create your family tree section:
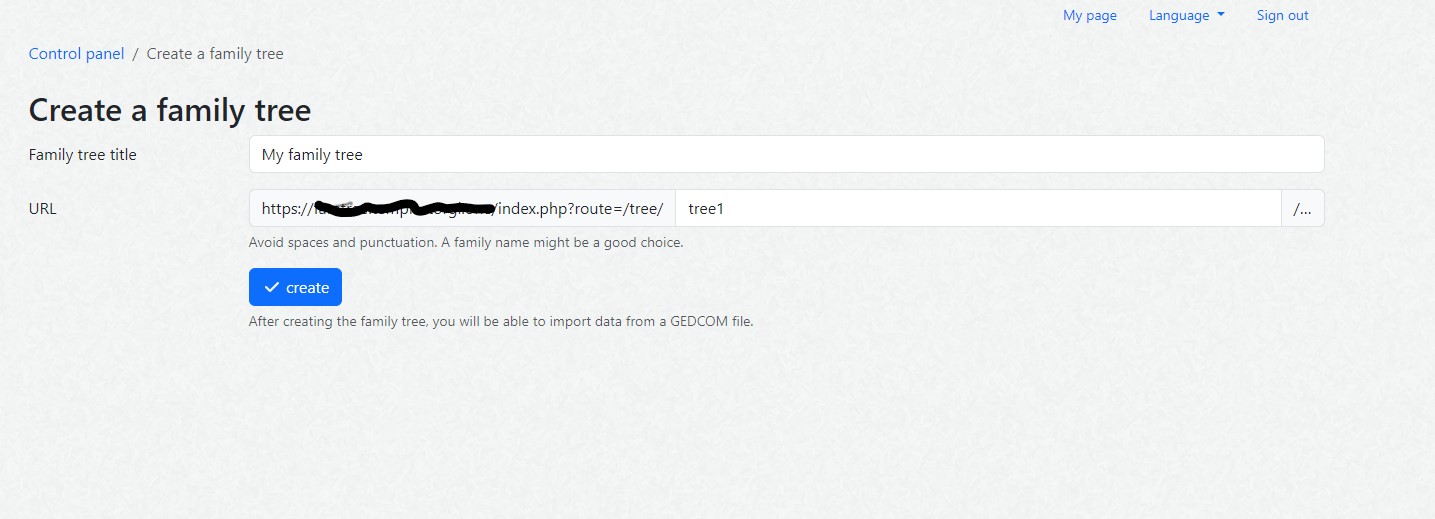
This screen will be prepopulated. I did not make any changes to the URL, but you could rename your family tree title to something a little more personal if you like, such as LAST NAME Family Tree. When you are done here, select “create” and you will be taken to the account control panel screen:
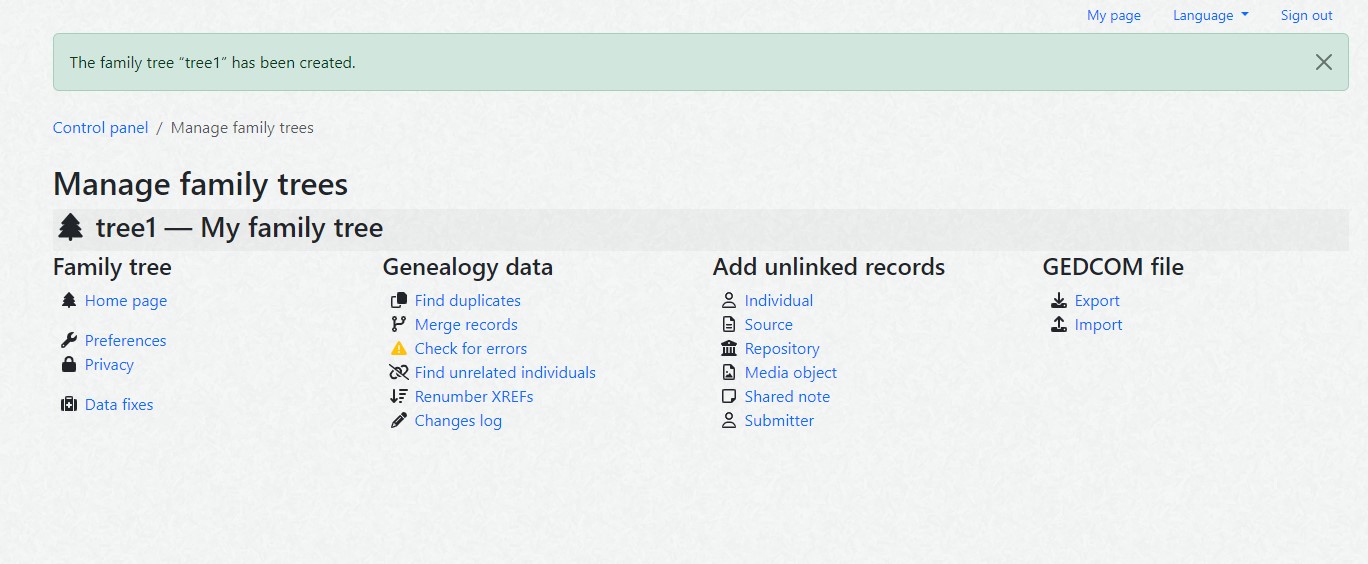
Now your application is installed. you are ready to go. No more coding, now it is all about setting up your valuable family history. From this screen you can start uploading your GEDCOM files, if you have them from a site like Ancestry. You can also just start fresh. If you click the Home Page Link under the Family tree section you will be taken to the default login screen below:
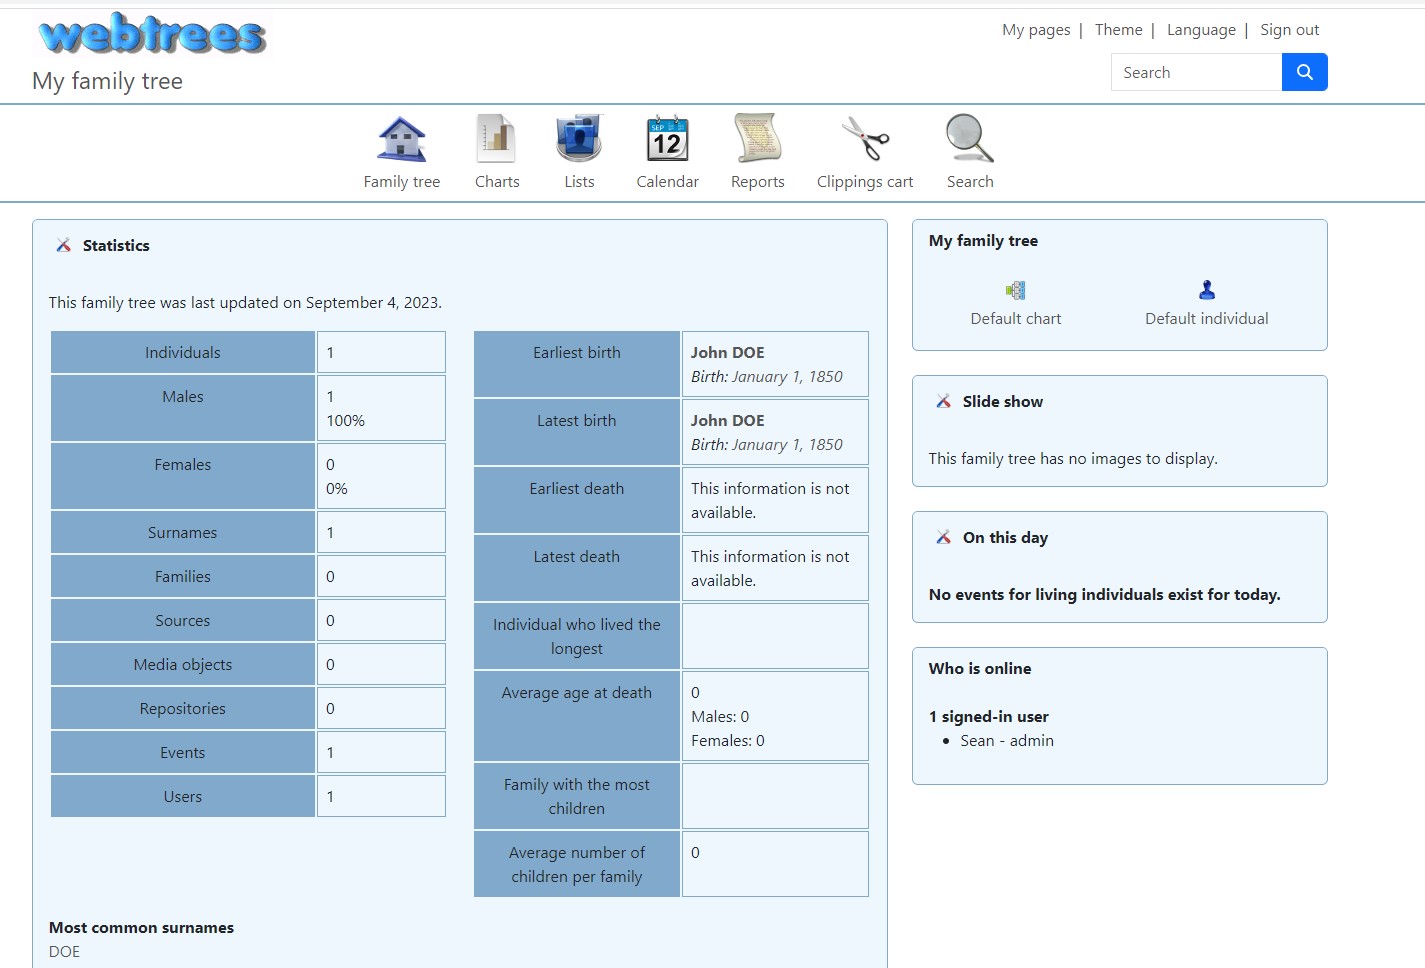
This screen is the default screen you will see to log into and begin planning your tree. webtrees is a lot like ancestry and some of the other genealogy sites, they can be a monster. Showing you how to set up a tree and use the program is the content for another post. However, we reached our objective of getting the application up and running on a self-hosted platform where you control the data and don’t have to pay to maintain a digital tree that you can share with family and friends who can help contribute.
To get your arms around how to use webtrees there is a ton of documentation and a community forum located at webtrees.net. This is where I learned all of my information on how to upload, create records, upload images, add users, set up SMTP, etc.
I will be creating a how-to for the application itself, but don’t wait for that, it will be a while. in the meantime, jump in, join the community, and help get your friends and loved ones on a free platform to host their genealogy data without the high cost for sites like ancestry.
As we come to the end of Part 2 in our journey of preserving your family history with web-based genealogy tools, we’ve covered a wide array of essential topics. From setting up your genealogy program for online access to securely organizing your research findings, we’ve laid the groundwork for building a lasting family legacy.
The digital age has revolutionized the way we document and share our family histories. With these web-based tools, we’ve unlocked the potential to bridge generations, connect with distant relatives, and ensure that our heritage endures. We have also showed we can do this and keep our hard earned money in our wallets … erm .. bank accounts.
The journey of preserving your family history is a deeply personal one, and there are countless discoveries yet to be made. As you continue this adventure, remember that the stories you uncover and the connections you forge are invaluable treasures for your family.
If you have any questions, insights, or experiences you’d like to share, please feel free to reach out. Your fellow genealogy enthusiasts and I are here to support you on your quest to uncover your family’s past.
Kia ora. I am from New Zealand.
I have followed your guide and it works perfectly.
I have entered my full Maori ancestry as well as my family links back to England via shipped to Sydney Australia. I have a very big family in New Zealand which I am in the process entering this.
As the database is very important to me I would not like to lose it.
Do you have any guidance on how Webtrees should be backed up. The guidance on the Webtrees website and on google is not very helpful particularly with regard to how to set up “phpMyAdmin”?