Download and Review the Code
This is a fun way to learn coding and game development. so, do you want to re-theme this code for an idea of yours as well? you can grab Rehan’s code from his github or you can download my forked version and continue to build off of it: https://github.com/SeanRiggs/HTML5-TMNT-Themed-browser-game.git.
Now download the raw code files from both sites and I will show you the modified files in the TMNT Game Theme Folder.
The Files and what they do in the original code:
index.html– This file only contains the canvas element and instructions to play the game.js/app.js– This contains the game characters and does the event handling.js/engine.js– This piece of the code has the actual game loop which sets the canvas and redraw the game each time based on the game characters data. There is some additional components in here as well that I will explain.js/resources.jsThis JavaScript code defines a utility calledResourcesfor loading and caching images in a game. It includes a resource cache, an array for tracking loading operations, and callbacks for handling image readiness. Theloadfunction can handle a single image or an array of images, and the private_loadfunction handles the loading process and caches the images once loaded. Developers can use theisReadyfunction to check if images are ready and theonReadyfunction to register callbacks. The code also creates a globalResourcesobject with functions for loading, retrieving, and handling image readiness.
What I changed:
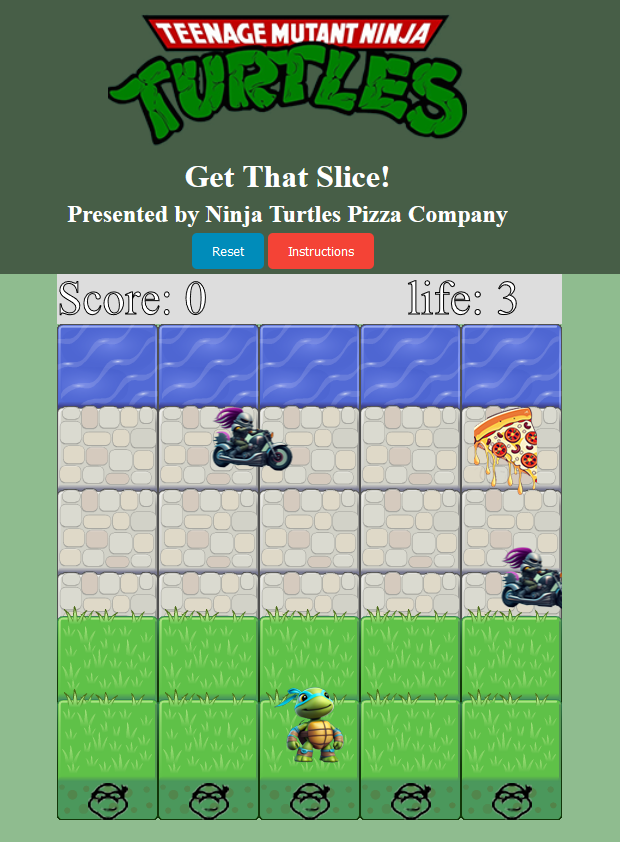
If you compare the index.html in Rehan’s code to the index.html file in the TMNT Game Theme Folder, the differences are introducing several changes and additions to enhance the appearance and functionality of the game:
- Favicon and Logo:
- Added a favicon (
tmnticon.ico) to improve the branding of the game. - Incorporated a Ninja Turtles logo (
images/banner.png) in the header for visual appeal.
- Added a favicon (
- Font Awesome Icons:
- Included Font Awesome CSS (
https://cdnjs.cloudflare.com/ajax/libs/font-awesome/5.15.3/css/all.min.css) to utilize icons for buttons, enhancing the overall design.
- Included Font Awesome CSS (
- Modal for Instructions:
- Created a modal (pop-up) for game instructions, providing a clearer and organized presentation of gameplay details.
- Added a button to open and close the instructions modal, improving user experience.
- Styling Enhancements:
- Improved styling with CSS for the modal, ensuring a visually appealing and consistent design.
- Additional Buttons:
- Introduced a “Reset” button (
#resetButton) to reset the game, enhancing user control. - Added an “Instructions” button (
#instructionsButton) to trigger the display of the instructions modal.
- Introduced a “Reset” button (
- Responsive Design:
- Implemented a responsive design element that shows a keyboard input option when the window width is less than 700 pixels.
- External Script Inclusion:
- Included an additional JavaScript file (
js/script.js), which was not present in the original code. This file contains additional game logic or functionality.
- Included an additional JavaScript file (
Looking at the app.js files the modifications contribute to a thematic transformation of the game, introducing elements from the Teenage Mutant Ninja Turtles universe, such as character sprites for Shredder and Leonardo, thematic gem sprites, and heart sprites for extra lives. Additionally, the modification to gem upgrades and the appearance and adds complexity and progression to the game.
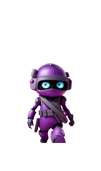
- Enemy Sprite:
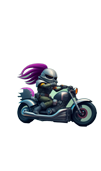
- Changed the sprite for the enemy (
app.Enemy) from ‘images/enemy-bug.png’ to ‘images/shredder-ico.png’, reflecting a thematic change to Shredder.
- Changed the sprite for the enemy (
- Player Sprite:
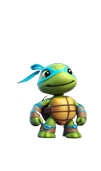
- Changed the sprite for the player (
app.Player) from ‘images/char-boy.png’ to ‘images/leo-ico.png’, making a hero shift to the character Leonardo.
- Changed the sprite for the player (
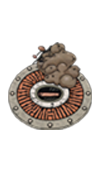
- Gem Sprites:
- Modified the array of gem names (
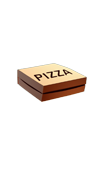
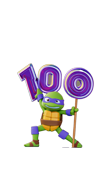
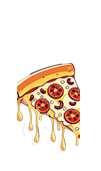
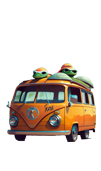
app.Gem.prototype.gems) and added numerous thematic sprites for gems, representing various in-game collectibles (e.g., pizza, money, TurtleVan, etc.).
- Modified the array of gem names (
- Gem Upgrade Conditions:
- Adjusted the conditions for gem upgrades (
app.Gem.prototype.update). The upgrades now occur at specific score milestones, introducing variety and progression in the game.
- Adjusted the conditions for gem upgrades (
- Heart Sprite:
- Changed the sprite for the heart (
app.Heart) from an unspecified image to ‘images/Heart.png’.
- Changed the sprite for the heart (
- Score Thresholds for Heart Appearance:
- Modified the conditions for the appearance of the heart, making it visible when certain score conditions are met. The heart will appear at specific score milestones.
For the engine.js files changes are mainly focused on updating images, including new sprites for enemies, player, gems, and other elements. Additionally, there I have adjusted the scoring conditions for upgrading gems in the app.Gem constructor.
1. app.Enemy and app.Player Constructors:
- Changed the
spriteproperty for bothapp.Enemyandapp.Playerto different image URLs.
2. app.Gem Constructor:
- Modified the
gemsarray to include additional image URLs. - Adjusted the condition in the
updatemethod to upgrade the gem based on different scores.
3. app.Heart Constructor:
- No significant changes to the
Heartconstructor.
4. Engine.js:
- Modified the
rowImagesarray in therenderfunction to include different image URLs. - Added additional image URLs to the
Resources.loadfunction.
I made no changes to the resources.js file. However, I included a file called script.js. The script.js file contains JavaScript code for handling a newly added game’s instructions pop-up and reset functionality. Here’s a summary of the main functions and features:
showInstructionsfunction:- Creates a pop-up element with the class name “popup.”
- Adds content to the pop-up, including instructions and a close button.
- Appends the pop-up to the
document.body. - Adds an event listener to the close button to remove the pop-up when clicked.
- Adds a window resize event listener (
adjustCloseButtonPosition) to keep the close button visible on resize.
adjustCloseButtonPositionfunction:- Adjusts the position of the close button when the window is resized, ensuring it remains visible.
resetGamefunction:- Reloads the page to reset the game when called.
- Event listeners:
- Attaches event listeners to HTML elements with the IDs “instructionsButton” and “resetButton.”
- The “instructionsButton” triggers the
showInstructionsfunction when clicked. - The “resetButton” triggers the
resetGamefunction when clicked.
showInstructionsModalfunction:- Shows the instructions modal by setting its display property to ‘block’.
- Displays the close button by setting its display property to ‘block’.
closeInstructionsModalfunction:- Hides the instructions modal by setting its display property to ‘none’.
- Hides the close button by setting its display property to ‘none’.
I also modified the style.css file to improve the visual design, responsiveness, and user experience of the web page and to match my new TMNT Theme.
- Header Styling:
- Added a semi-transparent background to the header for a visually appealing effect.
- Adjusted padding for proper alignment, enhancing the overall appearance.
- Logo Size Adjustment:
- Altered the logo width to 20%, providing better control over its size while maintaining the aspect ratio.
- Body Background:
- Changed the body background color to a greenish tone (
#8fbc8f), improving visual aesthetics.
- Changed the body background color to a greenish tone (
- Popup Styling:
- Introduced styles for a modal popup with a semi-transparent background, centered content, and a box shadow for a card-like appearance.
- Button Styling:
- Defined distinct styles for “Instructions” and “Reset” buttons, making them visually appealing with different background colors, padding, and rounded corners.
- Modal Styling:
- Introduced styles for a modal overlay, including a dark background overlay, centered content, and a styled close button for detailed instructions.
- List Item Styling in Modal:
- Enhanced the styling of list items inside the modal for a clean and visually appealing layout.
- Introduced a custom bullet icon using Font Awesome for list items.
- Close Button Positioning in Modal:
- Positioned the close button fixed to the top right of the modal for visibility and accessibility during scrolling.
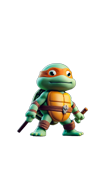
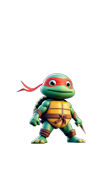
In the Images folders you will find all the new enemy, hero, and themed icons I used for the site. I did remove the original game gems as well.
Where to Get Custom Characters and Gems
I am NOT a good artist so I needed to enlist the help of AI to create my images. all of the character images I created were done using the free (at the time of this publishing) AI Image Generator Ideogram found at: https://ideogram.ai/. This site is really cool and you get plenty of prompts and images free for each day. Also, you are not restricted on how you use the images! You have the rights to publish anywhere you want!
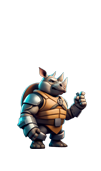
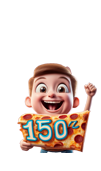
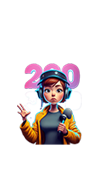
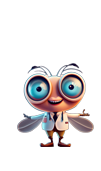
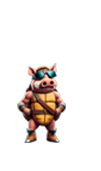
Here are some of the images:

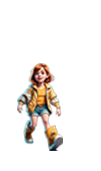
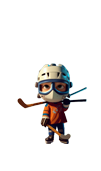
Generating images is only the first part. Now you need to remove the background so that only the character is visible when playing. To remove the background, you can use Photoshop. I have the paid version, but you can also us GIMP (an open-source version of Photoshop) or you can use one of my other favorite online tools at Canva.com. The free version is enough to upload the image, remove the background around the image and save as a .png. You can easily set the pixel size, so the images fit in the game squares.
For example, if you inspect leo-ico.png image you will find the sizes I used for his character:
| Info | Size |
|---|---|
|
Rendered size: |
101 x 171 px |
|
Rendered Aspect Ratio: |
101:171 |
|
File Size: |
13.8 kb |
Conclusion
By utilizing open-source projects like the one I’ve shared with you today, you open the door to a realm of possibilities. I hope this journey into re-theming an open-source game has sparked your interest and shown you that coding can be both approachable and enjoyable.
As we delved into the modifications and enhancements, we not only transformed the game aesthetically but also deepened our understanding of how HTML, CSS, and JavaScript collaborate to create engaging experiences. The addition of modals, styled buttons, and responsive design isn’t just about appearance – it’s about unraveling the intricacies of web technologies.
Creativity knows no bounds, and you certainly don’t need to be an artist to make visually appealing games. I shared my experience of using AI tools like Ideogram to generate images, proving that accessible resources are available to everyone.
So, here’s the invitation: embrace the world of coding, leverage open-source projects, and embark on your unique journey. The supportive community and wealth of resources are there to guide you and include resources like GitHub and Discord communities. Learning to code can be an exciting adventure, and each modification you make is a step towards mastering the craft and learning while having a premium product.
Finally, coding is not an exclusive club – it’s a playground waiting for your ideas and creativity. Start your coding adventure today, and remember: it’s not just about writing lines of code; it’s about bringing your imagination to life. Happy coding!
Appendix: Side by Side Code Comparison
Original Code: app.js
var app = app || {};

(function () {
    // Enemies our player must avoid
  app.Enemy = function(y) {
    // Variables applied to each of our instances go here,
    // we've provided one for you to get started

    // The image/sprite for our enemies, this uses
    // a helper we've provided to easily load images
    this.y = y;
    this.randomStartPos();
    this.sprite = 'images/enemy-bug.png';
    this.updateVelocityRandomizer();
  };

  // Update the enemy's position, required method for game
  // Parameter: dt, a time delta between ticks
  app.Enemy.prototype.update = function() {
    this.randomSpeed();
    if (this.x > 600) {
      this.newWave();
    }
  };

  app.Enemy.prototype.newWave = function() {
    this.randomStartPos();
    this.updateVelocityRandomizer();
  }

  app.Enemy.prototype.randomSpeed = function () {
    this.x = this.x + this.randomVelocity;
  }

  app.Enemy.prototype.updateVelocityRandomizer = function () {
    this.randomVelocity = Math.random() * 5;
  }

  app.Enemy.prototype.randomStartPos = function () {
    this.x = -(Math.random() * 400);
  }

  // Draw the enemy on the screen, required method for game
  app.Enemy.prototype.render = function() {
    app.ctx.drawImage(Resources.get(this.sprite), this.x, this.y);
  };

  app.Player = function() {
    this.life = 3;
    this.score = 0;

    // starting positions of the player. When we draw the game first time,
    // these values are used for the first frame.
    this.x = 200;
    this.y = 350;
    this.sprite = 'images/char-boy.png';
  };

    app.Player.prototype.renderText = function () {
    app.ctx.fillStyle = '#DDD';
    app.ctx.fillRect(0, 0, 510, 50);
    app.ctx.font = "48px serif";
    app.ctx.fillStyle = 'white';
    app.ctx.strokeStyle = 'black';
    app.ctx.fillText("Score: " + this.score, 0, 40, 150);
    app.ctx.strokeText("Score: " + this.score, 0, 40, 150);
    app.ctx.fillText("life: " + this.life, 350, 40);
    app.ctx.strokeText("life: " + this.life, 350, 40);
  };

  app.Player.prototype.render = function() {
    app.ctx.drawImage(Resources.get(this.sprite), this.x, this.y);
  };

  app.Player.prototype.handleInput = function(keyCode) {
  if(keyCode === 'up' && this.y > 0) {
    this.y = this.y - app.GAME_CONFIG.TILE_HEIGHT;
  }
  if(keyCode === 'down' && this.y < 400) {
    this.y = this.y + app.GAME_CONFIG.TILE_HEIGHT;
  }
  if(keyCode === 'right' && this.x < 400) {
    this.x = this.x + app.GAME_CONFIG.TILE_WIDTH;
  }
  if(keyCode === 'left' && this.x > 0) {
    this.x = this.x - app.GAME_CONFIG.TILE_WIDTH;
  }
  };

  app.Gem = function () {
  this.y = 70;
  this.x = app.GAME_CONFIG.TILE_WIDTH * Math.floor(Math.random() * 5);
  this.upgrade = 0;
  this.gems = ['Gem Blue', 'Gem Green','Gem Orange', 'Star'];
  this.sprite = 'images/'+this.gems[this.upgrade]+'.png';
  };

  app.Gem.prototype.update = function () {
    var player = app.ACTORS.player,
    gem = app.ACTORS.gem;

    if(player.score === 5 || player.score === 10 || player.score === 15) {
      gem.upgrade++;
    }
    this.sprite = 'images/'+this.gems[this.upgrade]+'.png';
    this.x = app.GAME_CONFIG.TILE_WIDTH * Math.floor(Math.random() * 5);
  };

  app.Gem.prototype.render = function () {
  app.ctx.drawImage(Resources.get(this.sprite), this.x, this.y);
  };

  // heart object for increaseing life
  app.Heart = function () {
    this.y = 70;
    this.notVisible = true;
    this.sprite = 'images/Heart.png';
  };

  app.Heart.prototype.update = function () {
    var player = app.ACTORS.player;

    if(this.notVisible && (player.score % player.life) % 2 && (player.score > player.life)) {
      this.notVisible = false;
      this.x = app.GAME_CONFIG.TILE_WIDTH * Math.floor(Math.random() * 5);
    }
  };

  app.Heart.prototype.render = function () {
  app.ctx.drawImage(Resources.get(this.sprite), this.x, this.y);
  };

  // This listens for key presses and sends the keys to your
  // app.Player.handleInput() method. You don't need to modify this.
  document.addEventListener('keyup', function(e) {
    var allowedKeys = {
        37: 'left',
        38: 'up',
        39: 'right',
        40: 'down',
        65: 'left',
        87: 'up',
        68: 'right',
        83: 'down'
    };

    app.ACTORS.player.handleInput(allowedKeys[e.keyCode]);
  });
})();
Original Code: engine.js
/* Engine.js
 * This file provides the game loop functionality (update entities and render),
 * draws the initial game board on the screen, and then calls the update and
 * render methods on your player and enemy objects (defined in your app.js).
 *
 * A game engine works by drawing the entire game screen over and over, kind of
 * like a flipbook you may have created as a kid. When your player moves across
 * the screen, it may look like just that image/character is moving or being
 * drawn but that is not the case. What's really happening is the entire "scene"
 * is being drawn over and over, presenting the illusion of animation.
 *
 * This engine is available globally via the Engine variable and it also makes
 * the canvas' context (ctx) object globally available to make writing app.js
 * a little simpler to work with.
 */

var app = app || {};

function between(x, min, max) {
    return x >= min && x <= max;
}

(function(global) {
    /* Predefine the variables we'll be using within this scope,
     * create the canvas element, grab the 2D context for that canvas
     * set the canvas elements height/width and add it to the DOM.
     */
    app.GAME_CONFIG = {
        CANVAS_WIDTH: 505,
        CANVAS_HEIGHT: 606,
        TILE_HEIGHT: 70,
        TILE_WIDTH: 100
    }
    app.ACTORS = {
        player: new app.Player(),
        allEnemies: [new app.Enemy(70), new app.Enemy(140), new app.Enemy(210)],
        gem: new app.Gem(),
        heart: new app.Heart()
    }

    var doc = global.document,
        win = global.window,
        canvas = doc.createElement('canvas'),
        ctx = canvas.getContext('2d'),
        lastTime, requestAnimationFrameID;

    app.ctx = ctx;

    canvas.width = app.GAME_CONFIG.CANVAS_WIDTH;
    canvas.height = app.GAME_CONFIG.CANVAS_HEIGHT;
    doc.body.appendChild(canvas);

    /* This function serves as the kickoff point for the game loop itself
     * and handles properly calling the update and render methods.
     */
    function main() {
        /* Get our time delta information which is required if your game
         * requires smooth animation. Because everyone's computer processes
         * instructions at different speeds we need a constant value that
         * would be the same for everyone (regardless of how fast their
         * computer is) - hurray time!
         */
        var now = Date.now(),
            dt = (now - lastTime) / 1000;

        /* Call our update/render functions, pass along the time delta to
         * our update function since it may be used for smooth animation.
         */
        update(dt);
        render();

        /* Set our lastTime variable which is used to determine the time delta
         * for the next time this function is called.
         */
        lastTime = now;

        /* Use the browser's requestAnimationFrame function to call this
         * function again as soon as the browser is able to draw another frame.
         */
        requestAnimationFrameID = win.requestAnimationFrame(main);
    }

    /* This function does some initial setup that should only occur once,
     * particularly setting the lastTime variable that is required for the
     * game loop.
     */
    function init() {
        reset();
        lastTime = Date.now();
        main();
    }

    /* This function is called by main (our game loop) and itself calls all
     * of the functions which may need to update entity's data. Based on how
     * you implement your collision detection (when two entities occupy the
     * same space, for instance when your character should die), you may find
     * the need to add an additional function call here. For now, we've left
     * it commented out - you may or may not want to implement this
     * functionality this way (you could just implement collision detection
     * on the entities themselves within your app.js file).
     */
    function update(dt) {
        updateEntities(dt);
        checkCollisions();
    }

    function checkCollisions() {
        var allEnemies = app.ACTORS.allEnemies,
        player = app.ACTORS.player,
        heart = app.ACTORS.heart,
        gem = app.ACTORS.gem;

        allEnemies.forEach(function(enemy) {
            if(between(player.x, (enemy.x - 60), (enemy.x + 60)) && between(player.y, (enemy.y - 10), (enemy.y + 10))) {
                player.life--;
                init();
            }
        });
        if(between(player.x, (gem.x - 60), (gem.x + 60)) && between(player.y, (gem.y - 10), (gem.y + 10))) {
            player.score++;
            gem.update();
            init();
        }
        if(between(player.x, (heart.x - 60), (heart.x + 60)) && between(player.y, (heart.y - 10), (heart.y + 10))) {
            player.life++;
            heart.notVisible = true;
            reset();
        }
     }

    /* This is called by the update function and loops through all of the
     * objects within your allEnemies array as defined in app.js and calls
     * their update() methods. It will then call the update function for your
     * player object. These update methods should focus purely on updating
     * the data/properties related to the object. Do your drawing in your
     * render methods.
     */
    function updateEntities(dt) {
        var allEnemies = app.ACTORS.allEnemies,
        heart = app.ACTORS.heart;

        allEnemies.forEach(function(enemy) {
            enemy.update(dt);
        });
        heart.update();
    }

    /* This function initially draws the "game level", it will then call
     * the renderEntities function. Remember, this function is called every
     * game tick (or loop of the game engine) because that's how games work -
     * they are flipbooks creating the illusion of animation but in reality
     * they are just drawing the entire screen over and over.
     */
    function render() {
        /* This array holds the relative URL to the image used
         * for that particular row of the game level.
         */
        var rowImages = [
                'images/water-block.png',   // Top row is water
                'images/stone-block.png',   // Row 1 of 3 of stone
                'images/stone-block.png',   // Row 2 of 3 of stone
                'images/stone-block.png',   // Row 3 of 3 of stone
                'images/grass-block.png',   // Row 1 of 2 of grass
                'images/grass-block.png'    // Row 2 of 2 of grass
            ],
            numRows = 6,
            numCols = 5,
            row, col;

        /* Loop through the number of rows and columns we've defined above
         * and, using the rowImages array, draw the correct image for that
         * portion of the "grid"
         */
        for (row = 0; row < numRows; row++) {
            for (col = 0; col < numCols; col++) {
                /* The drawImage function of the canvas' context element
                 * requires 3 parameters: the image to draw, the x coordinate
                 * to start drawing and the y coordinate to start drawing.
                 * We're using our Resources helpers to refer to our images
                 * so that we get the benefits of caching these images, since
                 * we're using them over and over.
                 */
                ctx.drawImage(Resources.get(rowImages[row]), col * 101, row * 83);
            }
        }

        renderEntities();
    }

    /* This function is called by the render function and is called on each game
     * tick. Its purpose is to then call the render functions you have defined
     * on your enemy and player entities within app.js
     */
    function renderEntities() {
        var allEnemies = app.ACTORS.allEnemies,
        player = app.ACTORS.player,
        heart = app.ACTORS.heart,
        gem = app.ACTORS.gem;

        gem.render();
        heart.render();
        /* Loop through all of the objects within the allEnemies array and call
         * the render function you have defined.
         */
        allEnemies.forEach(function(enemy) {
            enemy.render();
        });
        player.renderText();
        player.render();
    }

    /* This function does nothing but it could have been a good place to
     * handle game reset states - maybe a new game menu or a game over screen
     * those sorts of things. It's only called once by the init() method.
     */
    function reset() {
        var allEnemies = app.ACTORS.allEnemies,
        player = app.ACTORS.player,
        heart = app.ACTORS.heart,
        gem = app.ACTORS.gem;

        player.x = 200;
        player.y = 350;
        heart.x = -100;
        allEnemies.forEach(function(enemy) {
            enemy.newWave();
        });
        win.cancelAnimationFrame(requestAnimationFrameID);
        // requestAnimationFrameID = win.requestAnimationFrame(main);
    }

    /* Go ahead and load all of the images we know we're going to need to
     * draw our game level. Then set init as the callback method, so that when
     * all of these images are properly loaded our game will start.
     */
    Resources.load([
        'images/stone-block.png',
        'images/water-block.png',
        'images/grass-block.png',
        'images/enemy-bug.png',
        'images/char-boy.png',
        'images/Gem Blue.png',
        'images/Gem Green.png',
        'images/Gem Orange.png',
        'images/Star.png',
        'images/Heart.png'
    ]);
    Resources.onReady(init);
})(this);
TMNT Modified: app.js
var app = app || {};

(function () {
    // Enemies our player must avoid
  app.Enemy = function(y) {
    // Variables applied to each of our instances go here,
    // we've provided one for you to get started

    // The image/sprite for our enemies, this uses
    // a helper we've provided to easily load images
    this.y = y;
    this.randomStartPos();
    this.sprite = 'images/shredder-ico.png';
    this.updateVelocityRandomizer();
  };

  // Update the enemy's position, required method for game
  // Parameter: dt, a time delta between ticks
  app.Enemy.prototype.update = function() {
    this.randomSpeed();
    if (this.x > 600) {
      this.newWave();
    }
  };

  app.Enemy.prototype.newWave = function() {
    this.randomStartPos();
    this.updateVelocityRandomizer();
  }

  app.Enemy.prototype.randomSpeed = function () {
    this.x = this.x + this.randomVelocity;
  }

  app.Enemy.prototype.updateVelocityRandomizer = function () {
    this.randomVelocity = Math.random() * 5;
  }

  app.Enemy.prototype.randomStartPos = function () {
    this.x = -(Math.random() * 400);
  }

  // Draw the enemy on the screen, required method for game
  app.Enemy.prototype.render = function() {
    app.ctx.drawImage(Resources.get(this.sprite), this.x, this.y);
  };

  app.Player = function() {
    this.life = 3;
    this.score = 0;

    // starting positions of the player. When we draw the game first time,
    // these values are used for the first frame.
    this.x = 200;
    this.y = 350;
    this.sprite = 'images/leo-ico.png';
  };

    app.Player.prototype.renderText = function () {
    app.ctx.fillStyle = '#DDD';
    app.ctx.fillRect(0, 0, 510, 50);
    app.ctx.font = "48px serif";
    app.ctx.fillStyle = 'white';
    app.ctx.strokeStyle = 'black';
    app.ctx.fillText("Score: " + this.score, 0, 40, 150);
    app.ctx.strokeText("Score: " + this.score, 0, 40, 150);
    app.ctx.fillText("life: " + this.life, 350, 40);
    app.ctx.strokeText("life: " + this.life, 350, 40);
  };

  app.Player.prototype.render = function() {
    app.ctx.drawImage(Resources.get(this.sprite), this.x, this.y);
  };

  app.Player.prototype.handleInput = function(keyCode) {
  if(keyCode === 'up' && this.y > 0) {
    this.y = this.y - app.GAME_CONFIG.TILE_HEIGHT;
  }
  if(keyCode === 'down' && this.y < 400) {
    this.y = this.y + app.GAME_CONFIG.TILE_HEIGHT;
  }
  if(keyCode === 'right' && this.x < 400) {
    this.x = this.x + app.GAME_CONFIG.TILE_WIDTH;
  }
  if(keyCode === 'left' && this.x > 0) {
    this.x = this.x - app.GAME_CONFIG.TILE_WIDTH;
  }
  };

  app.Gem = function () {
  this.y = 70;
  this.x = app.GAME_CONFIG.TILE_WIDTH * Math.floor(Math.random() * 5);
  this.upgrade = 0;
  this.gems = ['pizza-ico', 'money-ico','TurtleVan-ico','pizza-box','Casey-Jones','splinter-ico','logo-ico','april-ico','fsoldier2','100pts','baxter','bebop','Rocksteady2','krang','raph-ico','150pts','manhole-game-ico','RiggsCat','boo','shark','200pts','pizzacomp'];
  this.sprite = 'images/'+this.gems[this.upgrade]+'.png';
  };

  app.Gem.prototype.update = function () {
    var player = app.ACTORS.player,
    gem = app.ACTORS.gem;

    if(player.score === 12 || player.score === 22 || player.score === 32 || player.score === 45 || player.score === 57|| player.score === 67 || player.score === 80 || player.score === 90 || player.score === 99 || player.score === 100 || player.score === 110 || player.score === 120 || player.score === 130 || player.score === 140 || player.score === 149 || player.score === 150 || player.score === 165 || player.score === 178 || player.score === 190 || player.score === 199 || player.score === 200) {
      gem.upgrade++;
    }
    this.sprite = 'images/'+this.gems[this.upgrade]+'.png';
    this.x = app.GAME_CONFIG.TILE_WIDTH * Math.floor(Math.random() * 5);
  };

  app.Gem.prototype.render = function () {
  app.ctx.drawImage(Resources.get(this.sprite), this.x, this.y);
  };

  // heart object for increaseing life
  app.Heart = function () {
    this.y = 70;
    this.notVisible = true;
    this.sprite = 'images/Heart.png';
  };

  app.Heart.prototype.update = function () {
    var player = app.ACTORS.player;

    if(this.notVisible && (player.score % player.life) % 2 && (player.score > player.life)) {
      this.notVisible = false;
      this.x = app.GAME_CONFIG.TILE_WIDTH * Math.floor(Math.random() * 5);
    }
  };

  app.Heart.prototype.render = function () {
  app.ctx.drawImage(Resources.get(this.sprite), this.x, this.y);
  };

  // This listens for key presses and sends the keys to your
  // app.Player.handleInput() method. You don't need to modify this.
  document.addEventListener('keyup', function(e) {
    var allowedKeys = {
        37: 'left',
        38: 'up',
        39: 'right',
        40: 'down',
        65: 'left',
        87: 'up',
        68: 'right',
        83: 'down'
    };

    app.ACTORS.player.handleInput(allowedKeys[e.keyCode]);
  });
})();
TMNT Modified: engine.js
/* Engine.js
 * This file provides the game loop functionality (update entities and render),
 * draws the initial game board on the screen, and then calls the update and
 * render methods on your player and enemy objects (defined in your app.js).
 *
 * A game engine works by drawing the entire game screen over and over, kind of
 * like a flipbook you may have created as a kid. When your player moves across
 * the screen, it may look like just that image/character is moving or being
 * drawn but that is not the case. What's really happening is the entire "scene"
 * is being drawn over and over, presenting the illusion of animation.
 *
 * This engine is available globally via the Engine variable and it also makes
 * the canvas' context (ctx) object globally available to make writing app.js
 * a little simpler to work with.
 */

var app = app || {};

function between(x, min, max) {
    return x >= min && x <= max;
}

(function(global) {
    /* Predefine the variables we'll be using within this scope,
     * create the canvas element, grab the 2D context for that canvas
     * set the canvas elements height/width and add it to the DOM.
     */
    app.GAME_CONFIG = {
        CANVAS_WIDTH: 505,
        CANVAS_HEIGHT: 606,
        TILE_HEIGHT: 70,
        TILE_WIDTH: 100
    }
    app.ACTORS = {
        player: new app.Player(),
        allEnemies: [new app.Enemy(70), new app.Enemy(140), new app.Enemy(210)],
        gem: new app.Gem(),
        heart: new app.Heart()
    }

    var doc = global.document,
        win = global.window,
        canvas = doc.createElement('canvas'),
        ctx = canvas.getContext('2d'),
        lastTime, requestAnimationFrameID;

    app.ctx = ctx;

    canvas.width = app.GAME_CONFIG.CANVAS_WIDTH;
    canvas.height = app.GAME_CONFIG.CANVAS_HEIGHT;
    doc.body.appendChild(canvas);

    /* This function serves as the kickoff point for the game loop itself
     * and handles properly calling the update and render methods.
     */
    function main() {
        /* Get our time delta information which is required if your game
         * requires smooth animation. Because everyone's computer processes
         * instructions at different speeds we need a constant value that
         * would be the same for everyone (regardless of how fast their
         * computer is) - hurray time!
         */
        var now = Date.now(),
            dt = (now - lastTime) / 1000;

        /* Call our update/render functions, pass along the time delta to
         * our update function since it may be used for smooth animation.
         */
        update(dt);
        render();

        /* Set our lastTime variable which is used to determine the time delta
         * for the next time this function is called.
         */
        lastTime = now;

        /* Use the browser's requestAnimationFrame function to call this
         * function again as soon as the browser is able to draw another frame.
         */
        requestAnimationFrameID = win.requestAnimationFrame(main);
    }

    /* This function does some initial setup that should only occur once,
     * particularly setting the lastTime variable that is required for the
     * game loop.
     */
    function init() {
        reset();
        lastTime = Date.now();
        main();
    }

    /* This function is called by main (our game loop) and itself calls all
     * of the functions which may need to update entity's data. Based on how
     * you implement your collision detection (when two entities occupy the
     * same space, for instance when your character should die), you may find
     * the need to add an additional function call here. For now, we've left
     * it commented out - you may or may not want to implement this
     * functionality this way (you could just implement collision detection
     * on the entities themselves within your app.js file).
     */
    function update(dt) {
        updateEntities(dt);
        checkCollisions();
    }

    function checkCollisions() {
        var allEnemies = app.ACTORS.allEnemies,
        player = app.ACTORS.player,
        heart = app.ACTORS.heart,
        gem = app.ACTORS.gem;

        allEnemies.forEach(function(enemy) {
            if(between(player.x, (enemy.x - 60), (enemy.x + 60)) && between(player.y, (enemy.y - 10), (enemy.y + 10))) {
                player.life--;
                init();
            }
        });
        if(between(player.x, (gem.x - 60), (gem.x + 60)) && between(player.y, (gem.y - 10), (gem.y + 10))) {
            player.score++;
            gem.update();
            init();
        }
        if(between(player.x, (heart.x - 60), (heart.x + 60)) && between(player.y, (heart.y - 10), (heart.y + 10))) {
            player.life++;
            heart.notVisible = true;
            reset();
        }
     }

    /* This is called by the update function and loops through all of the
     * objects within your allEnemies array as defined in app.js and calls
     * their update() methods. It will then call the update function for your
     * player object. These update methods should focus purely on updating
     * the data/properties related to the object. Do your drawing in your
     * render methods.
     */
    function updateEntities(dt) {
        var allEnemies = app.ACTORS.allEnemies,
        heart = app.ACTORS.heart;

        allEnemies.forEach(function(enemy) {
            enemy.update(dt);
        });
        heart.update();
    }

    /* This function initially draws the "game level", it will then call
     * the renderEntities function. Remember, this function is called every
     * game tick (or loop of the game engine) because that's how games work -
     * they are flipbooks creating the illusion of animation but in reality
     * they are just drawing the entire screen over and over.
     */
    function render() {
        /* This array holds the relative URL to the image used
         * for that particular row of the game level.
         */
        var rowImages = [
                'images/water-block.png',   // Top row is water
                'images/stone-block.png',   // Row 1 of 3 of stone
                'images/stone-block.png',   // Row 2 of 3 of stone
                'images/stone-block.png',   // Row 3 of 3 of stone
                'images/grass-block.png',   // Row 1 of 2 of grass
                'images/grass-block.png'    // Row 2 of 2 of grass
            ],
            numRows = 6,
            numCols = 5,
            row, col;

        /* Loop through the number of rows and columns we've defined above
         * and, using the rowImages array, draw the correct image for that
         * portion of the "grid"
         */
        for (row = 0; row < numRows; row++) {
            for (col = 0; col < numCols; col++) {
                /* The drawImage function of the canvas' context element
                 * requires 3 parameters: the image to draw, the x coordinate
                 * to start drawing and the y coordinate to start drawing.
                 * We're using our Resources helpers to refer to our images
                 * so that we get the benefits of caching these images, since
                 * we're using them over and over.
                 */
                ctx.drawImage(Resources.get(rowImages[row]), col * 101, row * 83);
            }
        }

        renderEntities();
    }

    /* This function is called by the render function and is called on each game
     * tick. Its purpose is to then call the render functions you have defined
     * on your enemy and player entities within app.js
     */
    function renderEntities() {
        var allEnemies = app.ACTORS.allEnemies,
        player = app.ACTORS.player,
        heart = app.ACTORS.heart,
        gem = app.ACTORS.gem;

        gem.render();
        heart.render();
        /* Loop through all of the objects within the allEnemies array and call
         * the render function you have defined.
         */
        allEnemies.forEach(function(enemy) {
            enemy.render();
        });
        player.renderText();
        player.render();
    }

    /* This function does nothing but it could have been a good place to
     * handle game reset states - maybe a new game menu or a game over screen
     * those sorts of things. It's only called once by the init() method.
     */
    function reset() {
        var allEnemies = app.ACTORS.allEnemies,
        player = app.ACTORS.player,
        heart = app.ACTORS.heart,
        gem = app.ACTORS.gem;

        player.x = 200;
        player.y = 350;
        heart.x = -100;
        allEnemies.forEach(function(enemy) {
            enemy.newWave();
        });
        win.cancelAnimationFrame(requestAnimationFrameID);
        // requestAnimationFrameID = win.requestAnimationFrame(main);
    }

    /* Go ahead and load all of the images we know we're going to need to
     * draw our game level. Then set init as the callback method, so that when
     * all of these images are properly loaded our game will start.
     */
    Resources.load([
        'images/stone-block.png',
        'images/water-block.png',
        'images/grass-block.png',
        'images/shredder-ico.png',
        'images/leo-ico.png',
        'images/pizza-ico.png',
        'images/money-ico.png',
        'images/TurtleVan-ico.png',
        'images/pizza-box.png',
        'images/Casey-Jones.png',
        'images/splinter-ico.png',
        'images/logo-ico.png',
        'images/april-ico.png',
        'images/fsoldier2.png',
        'images/100pts.png',
        'images/baxter.png',
        'images/bebop.png',
        'images/Rocksteady2.png',
        'images/krang.png',
        'images/raph-ico.png',
        'images/150pts.png',
        'images/manhole-game-ico.png',
        'images/200pts.png',
        'images/RiggsCat.png',
        'images/boo.png',
        'images/shark.png',
        'images/pizzacomp.png',
        'images/Heart.png'
    ]);
    Resources.onReady(init);
})(this);
CSS Style Differences
body {
  text-align: center;
  background: #DDD;
}

h1, p {
  margin: 5px;
}

#keyboard {
  opacity: 0;
}

.keyboard-link {
  display: none;
}
/* Header Section */
header {
background-color: rgba(0, 0, 0, 0.5); /* Semi-transparent background */
padding: 5px 5px 5px 124px; /* 5px padding on top, right, bottom, and 24px on the left */
color: white;
}
/* Adjust the width of the logo */
.logo {
width: 20%; /* You can adjust the width as needed */
max-width: none; /* Prevent maximum width restrictions */
height: auto; /* Maintain aspect ratio */
}
h1, h2 {
margin: 5px;
}
body {
text-align: center;
background: #8fbc8f;
margin: 0;
}
h1, p {
margin: 5px;
}
#keyboard {
opacity: 0;
}
.keyboard-link {
display: none;
}
/* CSS for the pop-up */
.popup {
position: fixed;
top: 0;
left: 0;
width: 100%;
height: 100%;
background-color: rgba(0, 0, 0, 0.7);
display: flex;
justify-content: center;
align-items: center;
z-index: 9999;
}
.popup-content {
background-color: white;
padding: 20px;
border-radius: 5px;
box-shadow: 0 0 10px rgba(0, 0, 0, 0.3);
text-align: center;
}
.popup-content h3 {
margin-top: 0;
}
/* Style for the "Instructions" button */
.button-instructions {
background-color: #f44336; /* Red background color */
color: white; /* White text color */
padding: 10px 20px; /* Padding around the button text */
border: none; /* Remove the button border */
border-radius: 5px; /* Rounded corners */
cursor: pointer; /* Add a pointer cursor on hover */
margin-right: 10px; /* Add right margin to separate from other content */
}
/* Style for the "Reset" button */
.button-reset {
background-color: #008CBA; /* Blue background color */
color: white; /* White text color */
padding: 10px 20px; /* Padding around the button text */
border: none; /* Remove the button border */
border-radius: 5px; /* Rounded corners */
cursor: pointer; /* Add a pointer cursor on hover */
}
/* Styles for the modal (pop-up) */
.modal {
display: none; /* Hidden by default */
position: fixed; /* Stay in place */
z-index: 1; /* Sit on top */
left: 0;
top: 0;
width: 100%;
height: 100%;
overflow: auto; /* Enable scroll if needed */
background-color: rgba(0, 0, 0, 0.7); /* Black background with transparency */
}
.modal-content {
background-color: #fefefe;
margin: 15% auto; /* 15% from the top and centered */
padding: 20px;
border: 1px solid #888;
width: 80%; /* 80% width of the modal */
max-width: 500px; /* Max width */
text-align: center; /* Center-align the content in the modal */
}
/* Styling for the close button in the modal */
.close {
color: #fff;
background-color: #f44336; /* Red background color */
padding: 5px 10px; /* Padding around the button text */
border: none; /* Remove the button border */
border-radius: 5px; /* Rounded corners */
cursor: pointer; /* Add a pointer cursor on hover */
}
.close:hover {
background-color: #ff6659; /* Darker red background color on hover */
}
/* Left-align the list items */
.modal-content ul {
text-align: left; /* Left-align the list items */
list-style: none; /* Remove default list-style */
padding-left: 0; /* Remove default left padding for list items */
}
/* Style for the list items */
.modal-content ul li {
margin-left: 20px; /* Add some left margin for the list items */
font-weight: bold; /* Make list items bold */
color: #333; /* Change the color of list items */
position: relative; /* Add relative positioning for the ::before pseudo-element */
margin-bottom: 15px; /* Add margin to increase spacing between each bullet statement */
}
/* Style for the list item bullets (using Font Awesome pizza-slice icon) */
.modal-content ul li::before {
content: "\f818"; /* Use the Unicode character for the pizza-slice icon from Font Awesome */
font-family: 'Font Awesome 5 Free'; /* Specify the Font Awesome font family */
color: #f44336; /* Change the color of the pizza icon */
font-size: 16px; /* Adjust the size of the pizza icon */
margin-right: 5px; /* Add some right margin to separate the pizza icon from text */
position: absolute; /* Position the icon absolutely within the list item */
left: -20px; /* Adjust the left position to align the icon with the text */
top: 50%; /* Vertically center the icon */
transform: translateY(-50%); /* Correct vertical alignment */
}
/* Styling for the close button in the modal */
.close {
position: fixed;
top: 150px;
right: 50px;
color: #fff;
background-color: #f44336; /* Red background color */
padding: 5px 10px; /* Padding around the button text */
border: none; /* Remove the button border */
border-radius: 5px; /* Rounded corners */
cursor: pointer; /* Add a pointer cursor on hover */
z-index: 999; /* Ensure the button stays on top */
}
.close:hover {
background-color: #ff6659; /* Darker red background color on hover */
}HTML Differences
<!DOCTYPE html>
<html>
<head>
    <meta charset="UTF-8">
    <meta name="viewport" content="user-scalable=no">
    <title>TMNT - Get That Slice!</title>
    <link rel="stylesheet" href="css/style.css">
</head>
<body>
    <h1>Controls</h1>
    <p>
      Use up, down, left, right keys or safari mobile users can
      alternatively use w, a, s, d keys to move the player.
    </p>
    <input type="text" id="keyboard">
    <a class="keyboard-link" href="#" onclick="document.getElementById('keyboard').focus();">
      click here to get keyboard (if you are from mobile devices)
    </a>
    <script>
      var keyboardElm = document.getElementsByClassName("keyboard-link")[0];
      window.addEventListener("resize", showKeyboard);
      function showKeyboard() {
        if (window.innerWidth < 700) {
          keyboardElm.setAttribute("style", "display: block;")
        }
      }
    </script>
    <script src="js/resources.js"></script>
    <script src="js/app.js"></script>
    <script src="js/engine.js"></script>
</body>
</html>
<!DOCTYPE html>
<html lang="en">
<head>
<meta charset="UTF-8">
<meta name="viewport" content="user-scalable=no">
<title>TMNT - Get That Slice!</title>
<link rel="icon" href="tmnticon.ico" type="image/x-icon">
<link rel="stylesheet" href="css/style.css">
<!-- Include Font Awesome CSS -->
<link rel="stylesheet" href="https://cdnjs.cloudflare.com/ajax/libs/font-awesome/5.15.3/css/all.min.css">
<!-- CSS for the modal -->
<style>
/* Styles for the modal (pop-up) */
.modal {
display: none; /* Hidden by default */
position: fixed; /* Stay in place */
z-index: 1; /* Sit on top */
left: 0;
top: 0;
width: 100%;
height: 100%;
overflow: auto; /* Enable scroll if needed */
background-color: rgba(0, 0, 0, 0.7); /* Black background with transparency */
}
.modal-content {
background-color: #fefefe;
margin: 15% auto; /* 15% from the top and centered */
padding: 20px;
border: 1px solid #888;
width: 80%; /* 80% width of the modal */
max-width: 500px; /* Max width */
}
/* Close button in the modal */
.close {
color: #aaaaaa;
float: right;
font-size: 28px;
font-weight: bold;
}
.close:hover,
.close:focus {
color: #000;
text-decoration: none;
cursor: pointer;
}
</style>
</head>
<body>
<!-- Header Section -->
<header>
<!-- Logo and other header content -->
<img src="images/banner.png" alt="Ninja Turtles Logo" class="logo">
<h1>Get That Slice!</h1>
<h2>Presented by Ninja Turtles Pizza Company</h2>
<!-- Reset button -->
<button id="resetButton" class="button-reset" onclick="resetGame()">Reset</button>
<!-- Instructions button -->
<button id="instructionsButton" class="button-instructions" onclick="showInstructions()">Instructions</button>
</header>
<!-- Pop-up modal for instructions -->
<div id="instructionsModal" class="modal">
<button class="close" onclick="closeInstructionsModal()">Close</button>
<div class="modal-content">
<h2>Instructions</h2>
<section>
<h3>Objective:</h3>
<p>The goal of the game is to collect as many pizza slices as possible while avoiding obstacles. As you collect pizza slices successfully you will begin to "level up" and differnt collection items will start showing up ... some <i>easter eggs</i> and special characters! </p>
</section>
<section>
<h3>Controls:</h3>
<ul>
<li>Use the arrow keys on your keyboard to control the movement of your Ninja Turtle character. Using W, S, A, and D keys also work to move Leonardo! </li>
<li>Move up, down, left, and right to navigate through the pizza-filled maze.</li>
</ul>
</section>
<section>
<h3>Gameplay:</h3>
<ul>
<li>Your Ninja Turtle will automatically move in the direction you press.</li>
<li>Collect as many pizza slices and other items as you can to earn points.</li>
<li>Be careful! Avoid running into The Evil Shredder as he will run you down with his motorbike.</li>
<li>If you touch shredder ... you'll lose a life.</li>
<li>You have three lives, so use them wisely!</li>
<li>Your score will be displayed at the top of the game screen.</li>
</ul>
</section>
<section>
<h3>Special Power-ups:</h3>
<ul>
<li>Look out for power-up items that may appear throughout the game.</li>
<li>Power-ups will provide you with extra lives!</li>
<li>These power ups come in the form of a heart, Collect them to enhance your chances of success.</li>
</ul>
</section>
<section>
<h3>Winning the Game:</h3>
<ul>
<li>The game continues until you lose all your lives.</li>
<li>Challenge yourself to achieve the highest score possible and become a pizza-eating champion!</li>
</ul>
</section>
<section>
<h3>Tips:</h3>
<ul>
<li>Plan your moves carefully to avoid obstacles and collect pizza efficiently.</li>
<li>Keep an eye out for enemies' patterns and adjust your strategy accordingly.</li>
<li>Use power-ups strategically to maximize your score.</li>
</ul>
<a rel="Copyright Information" href="https://github.com/SeanRiggs/HTML5-TMNT-Themed-browser-game/blob/master/TMNT_Game_Theme/Legal-README.md">Copright Information</a>
</section>
</div>
</div>
<input type="text" id="keyboard">
<a class="keyboard-link" href="#" onclick="document.getElementById('keyboard').focus();">
click here to get keyboard (if you are from mobile devices)
</a>
<script>
var keyboardElm = document.getElementsByClassName("keyboard-link")[0];
window.addEventListener("resize", showKeyboard);
function showKeyboard() {
if (window.innerWidth < 700) {
keyboardElm.setAttribute("style", "display: block;")
}
}
// Show the instructions modal
function showInstructions() {
var instructionsModal = document.getElementById('instructionsModal');
instructionsModal.style.display = 'block';
}
// Close the instructions modal
function closeInstructionsModal() {
var instructionsModal = document.getElementById('instructionsModal');
instructionsModal.style.display = 'none';
}
// Function to reset the game (you can implement this logic)
function resetGame() {
// Add your reset game logic here
}
</script>
<script src="js/resources.js"></script>
<script src="js/app.js"></script>
<script src="js/engine.js"></script>
<script src="js/script.js"></script>
</body>
</html>
Sooooo I don’t code to save my life! Yet, you somehow made it doable! Thanks for this awesome blog post. Your demo game is siiiiick!