Instead of explaining how to permanently mount an external drive so that it is recognized at the same location after being ejected or your system reboots in every post, I thought I’d put this in a separate post with the quick and dirty steps! A permanent mounting location is important if you run any media server or attached storage volume where users expect to pull data or media from the same location each time. For example, storing media for Plex Media Server, Emby, Kodi, Jellyfin, etc., these services map volume locations to specific drives. We don’t want those locations changing after an updated reboot or ejecting your drive to transfer data, etc. This could also be true if you map all your config and database files for Docker containers to a specific drive location.
I’m doing this example on a Raspberry Pi running RaspbianOS, so adjust as needed for your Linux distro.
If you are following my build, then I recommend having the following:
- Raspberry Pi 4 (I'm Using a 4G)
- MiroSD with latest RaspianOS flashed
- Internet Connection
- USB Keyboard and Mouse
- External Storage Device (USB Stick, USB External Drive, etc.)
USB Mounting
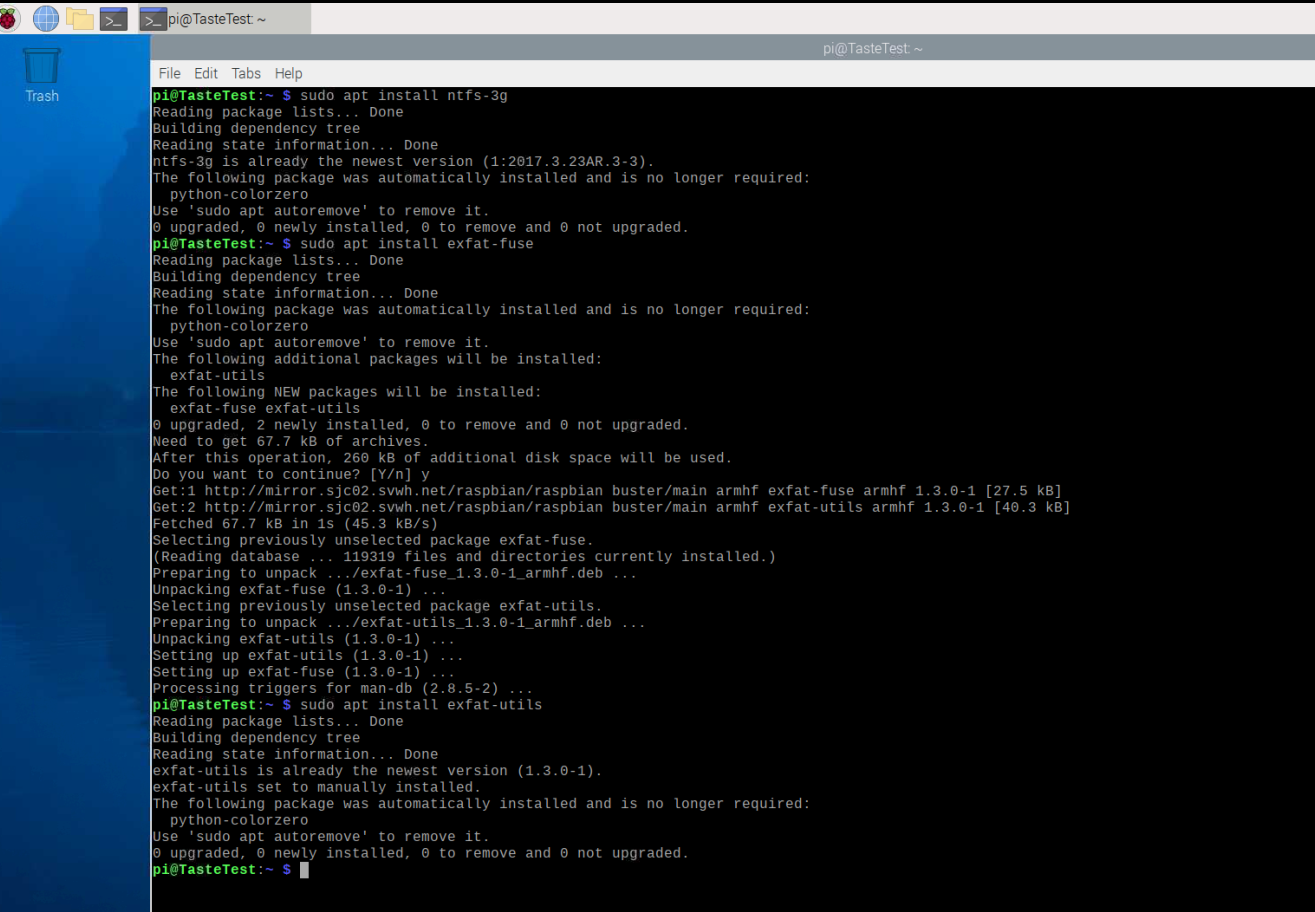
Before we get too far ahead, if your storage device will be formatted as NTFS or exFAT we need to be sure that you have the NTFS driver and or exFAT packages installed. I did both so it would be there if needed.
Adding NTFS driver:
sudo apt install ntfs-3gAdding exFAT packages:
sudo apt install exfat-fuse
sudo apt install exfat-utils
(Click to enlarge example). Now you should be ready to mount the drive to your desired location and have support tools for NTFS and exFAT drive formats. This will be important for adding read/write permissions to these types of drives when you mount them to the FSTAB file.
As we step through this, consider the user name you are using as that is who we will be giving permissions to. For me on my Raspberry Pi, I will use the default user of pi. So, next we will make a directory for our drive to mount to (under the mnt folder), we will set the folder permissions, and we will edit the fstab file.
Make a directory and set permissions
I am going to make a directory that matches the name I give my USB Drive. You can name this anything you want. I named my drive “piranha”
sudo mkdir -p /mnt/piranha
sudo chown -R pi:pi /mnt/piranha
Before we edit the fstab file we need to find your attached drive’s current location, UUID, and format type. To do this we run the disk-free command to find the location of the drive, then using the blkid tool to retrieve the disk UUID and type.
df -houtput:
Filesystem     1K-blocks    Used Available Use% Mounted on
/dev/root       14894832 5055928   9180452  36% /
devtmpfs          702336       0    702336   0% /dev
tmpfs             867200       0    867200   0% /dev/shm
tmpfs             867200    9020    858180   2% /run
tmpfs               5120       4      5116   1% /run/lock
tmpfs             867200       0    867200   0% /sys/fs/cgroup
/dev/mmcblk0p1    258095   49172    208924  20% /boot
tmpfs             173440       4    173436   1% /run/user/1000
/dev/sda1       15653868   66464  15587404   1% /media/pi/62FDDF6E7D60F20C
Here we see the USB drive mounted on /dev/sda1. Now that we see where it is mounted we can run the blkid tool to get the UUID and format type.
sudo blkid /dev/sda1output:
/dev/sda1: UUID="62FDDF6E7D60F20C" TYPE="ntfs" PTTYPE="dos" PARTLABEL="piranha" PARTUUID="a7e7a5ce-75b0-d447-b0e3-3b43ed1cb803"You can see it came back with my drives UUID and a format type of NTFS. Now let’s edit the fstab file.
When choosing the format type for your external drive, consider that many smaller USB drives come formatted as fat32 and if you keep this format you will be limited to a maximum file size of 4G. Using NTFS is universal across most OS’.”
Edit the fstab file
sudo nano /etc/fstabEnter in your UUID information (in place of mine listed here) as well as your mount location and name, and file system type. Below is my example of my fstab with my UUID input in place. You may have more or less in there that was already populated. Do not change anything else; add the line for your drive, as you see in the file below for mine (starting with the UUID).
Once done, save the file by pressing CTRL + X, followed by Y, then the ENTER key.
proc            /proc           proc    defaults          0       0
PARTUUID=62c7286f-01  /boot           vfat    defaults          0       2
PARTUUID=62c7286f-02  /               ext4    defaults,noatime  0       1
UUID=a7e7a5ce-75b0-d447-b0e3-3b43ed1cb803 /mnt/piranha ntfs  defaults,auto,users,rw,nofail,umask=000 0 0
# a swapfile is not a swap partition, no line here
#   use  dphys-swapfile swap[on|off]  for that
Now we need to unmount and remount the drive for the changes to take effect. I’d also reboot just to see if it automatically mounts the drive. I always run multiple commands one at a time, but feel free to copy and run all at once if you like:
sudo umount /dev/sda1
sudo mount -a
sudo reboot now
After reboot, you should check the /mnt folder to validate your drive mounted as a folder in this location.
pi@TasteTest:~ $ cd /mnt
pi@TasteTest:/mnt $ ls
piranha
pi@TasteTest:/mnt $ cd piranha
pi@TasteTest:/mnt/piranha $
If everything went as planed you should be able to see your drive as a folder in the location above. You are done now! All the data you save to this folder will stay mounted in this location.
