![]() This is part 2 of my Huginn blog. In the first part, I detailed how to install the application on various infrastructures. I also described how to organize scenarios and modify the default demo scenario. Now you’re ready to do your own thing with Huginn, and here are some ideas.
This is part 2 of my Huginn blog. In the first part, I detailed how to install the application on various infrastructures. I also described how to organize scenarios and modify the default demo scenario. Now you’re ready to do your own thing with Huginn, and here are some ideas.
I will show you excellent websites to get idea scenarios, share my modified scenarios and explain a bit of the JSON, XML, HTML, and formatting I used and learned along the way. Additionally, I will share references and sites of some people who unknowingly helped me get this far. Finally, I will also leave JSON files of the scenarios I am using so you can use them as well, importing them into your Huginn instance and changing the variables to fit your needs.
I created a scenario simply called Twitter stream agent. This agent is adapted from Andrew Cantino’s “know when the world changes” example. This agent uses a bot to evaluate your chosen keywords streaming on Twitter. Using a standard deviation equation to calculate threshold values, the detector agent evaluates spike in mentions on particular keywords and will notify you via email (or other means if set up, i.e., telegram) that this is occurring in real-time.
To effectively use this agent, you must have (or create) a Twitter account and apply for a personal Twitter developer account (quick and easy). You can do that here: https://developer.twitter.com/en/apps.
After establishing a developer account, log into the dashboard and create a standalone application.

- You’ll need to name your application.
- You’ll also need a description.
- The required website could be your personal site or your Twitter profile URL.
- enable OAuth
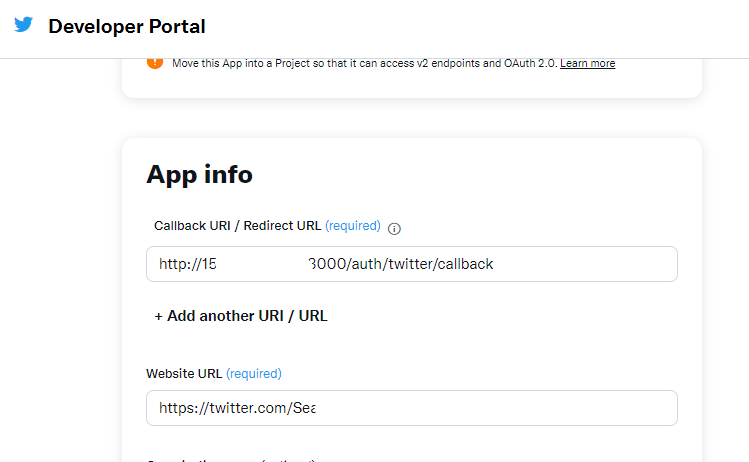
The Callback URL is essential; you need to set it to the following:
- HTTP://<your-huginn-domain.com>/auth/Twitter/callback – replace <your-huginn-domain.com> with your domain name.
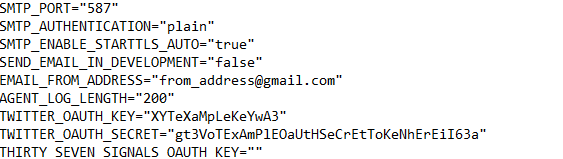
On the “API Keys” page, you need to note down your “API Key” and “API Secret,” and then:
- If you’re hosting Huginn yourself, open your Huginn .env file and set TWITTER_OAUTH_KEY to the API Key and TWITTER_OAUTH_SECRET to the API Secret.
After you save your .env file, restart your Huginn instance.
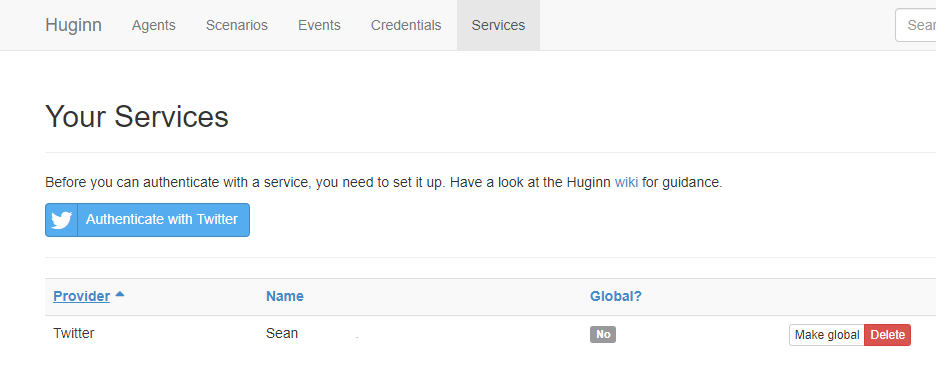
Log back into your Huginn instance via the GUI and navigate to the Services Page menu. You should be able to select and then authenticate with Twitter. I had zero issues getting this to sync up, but if you do, then consult the Oauth Wiki here: https://github.com/huginn/huginn/wiki/Configuring-OAuth-applications.
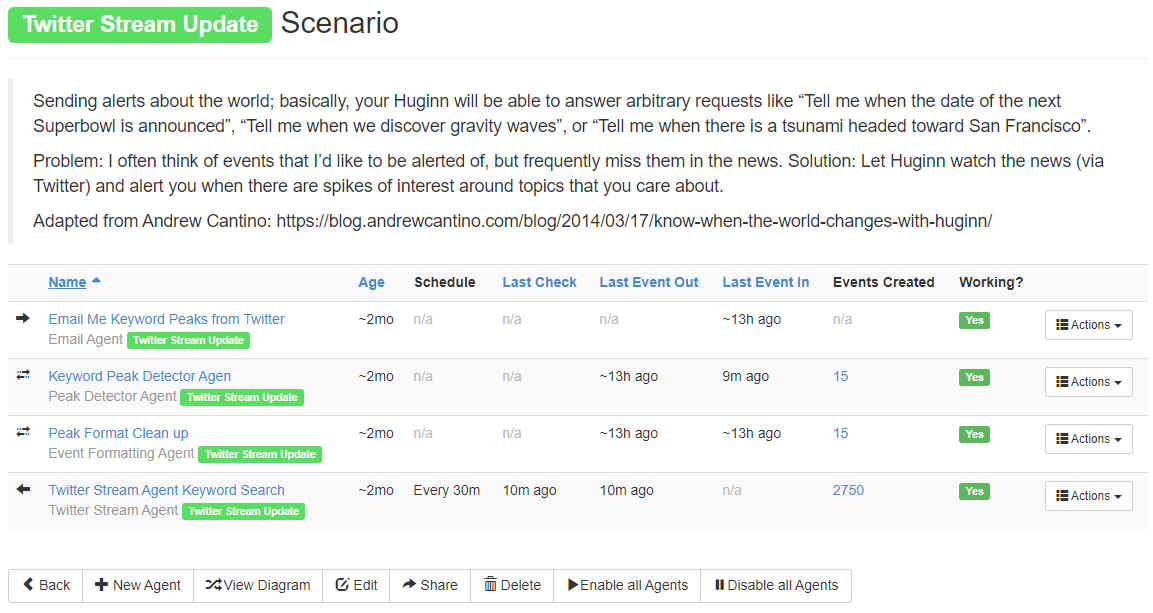
 For this scenario, I used 4 agents: a Twitter Stream Agent, a Keyword Peak Detector Agent, A Event Format Agent, and an Email Agent.
 The diagram flow of the scenario would look like this.

The diagram shows that a keyword search runs and sends output to a peak detector agent. That agent measures a spike in data and sends the data on to be formatted and emailed out to notification contacts if peaks are detected.
Let’s step through these 4 agents quickly, and you can see how I set them up.
The first agent is a Twitter Stream Agent. The setup of this agent is very straightforward. You name the agent, select your Twitter service setup, choose your time schedule (every 30 mins), decide how long you want to keep events and add your receivers and scenarios. If you import this as a scenario described later, these will be pre-populated, and you will only need to adjust the JSON keywords to meet your needs. Note that your receiver agent may still need to be set up, and you can come back and set this up later if needed.

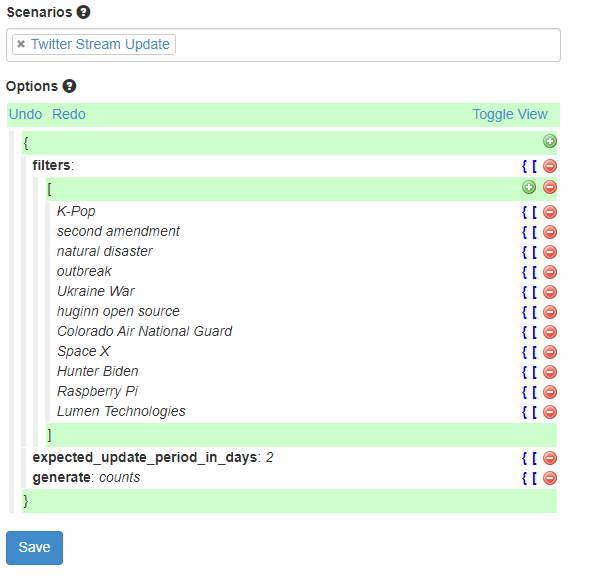
In your filter section is where those keywords are populated. I included key phrases I thought would help me test this scenario effectively, and it worked well. You would adjust yours as desired, of course.
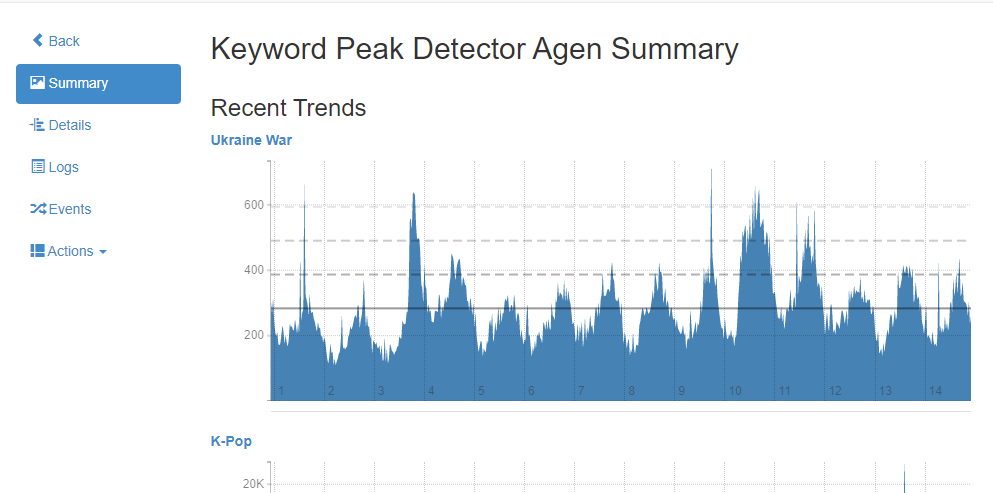
From the keyword search, this feeds into the Peak Detector Agent. This agent analyzes for a peak increase in tweets a particular monitored keyword is getting. If there is a significant increase in tweets during the monitored time frame, it sends a message to the Peak format cleanup agent to prepare the data for email notification. I used the example from the Huginn creator and did not modify what was used for his settings on std deviation, etc.
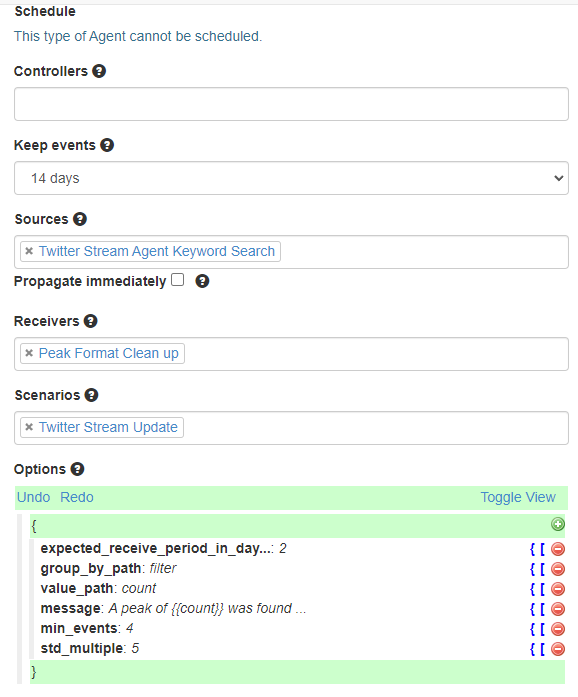
In the example of the JSON:
The number of tweets is analyzed for peaks meeting min events and std_multiple values. Then a message is created, giving a count and filter for a keyword to pass on to the formatting agent.
The formatting agent takes the information and sets the conditions for the information to be sent by the email agent (receiver). As needed, the format agent adds new fields to the data and retains source message data.

Keep going if this is confusing; there are good instructions for each agent in the right margins of any edit screen. Also, you download the scenario and open it in notepad or any code editor. In that case, it really paints a picture of how the agents pull, send, format, and interpret data from each other and API sources.
The final agent in this scenario is the email agent. The agent is set up to receive the message information from the formatting agent, enter a subject line, and send a notification email to the default contact on the Huginn instance.
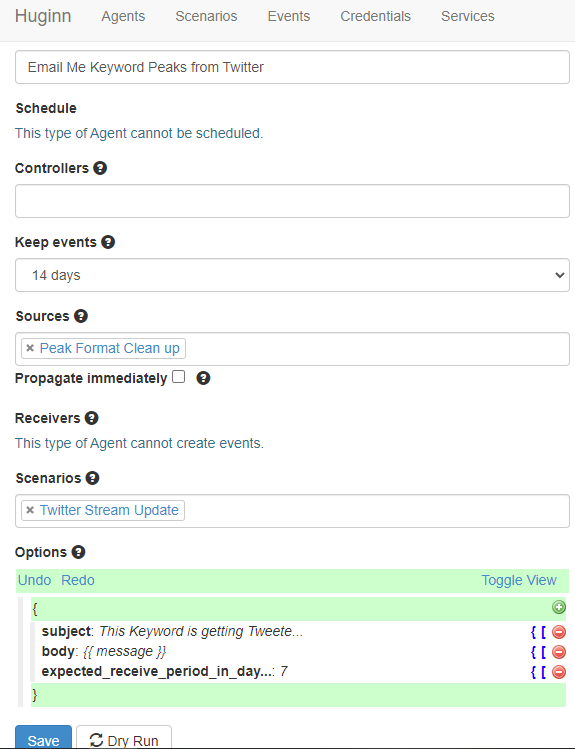
Note that you can specify one or more recipients for the email. In this agent, we skip the option to notify multiple contacts and will send the email to the account’s default email address.
You would add something like the following in the options fields (JSON – toggle to raw view) to include multiple recipients:
This agent scans Feeds from the CDC, WHO, and local sources for news on Coronavirus (and other diseases). I have adapted the scenario from The Doctor and updated it to remove some broken WHO links, update receiving emails, and update keywords I wanted to be scanned.
Here is a direct link to the JSON file you can review and download to your computer for upload to your instance of Huginn.
There is a couple ways to import scenarios in Huginn. You can upload directly from a file, or you can upload from a URL. If doing this from a GitHub URL, then open the file in GitHub and select the “RAW” button in the header to parse just the JSON content in the file that will be uploaded.


In the second picture above, you can see the 2 options available. Import the new scenario by one of these methods. You will receive a confirmation screen asking you to validate adding multiple new agents; there will be many. Say yes to this. Agents you do not want, you can remove later. Once imported, you can navigate to your scenario to validate the created agents. If you are savvy in JSON and know what you want to be modified before uploading, you can update the file beforehand. However, I found it very easy to use the diagram in Huginn to analyze the logic and edit the agents (or delete them) to meet my specific design needs.
Really, what this scenario has are various identified feeds that are reliable sources for information on the Coronavirus and other outbreak diseases, with dedicated feeds for news agencies and other receiving sources. The RSS Links are updated from the doctor’s original scenario; some were removed and have links that no longer worked. For example, the World Health Organization provided additional links to deactivated RSS feeds.
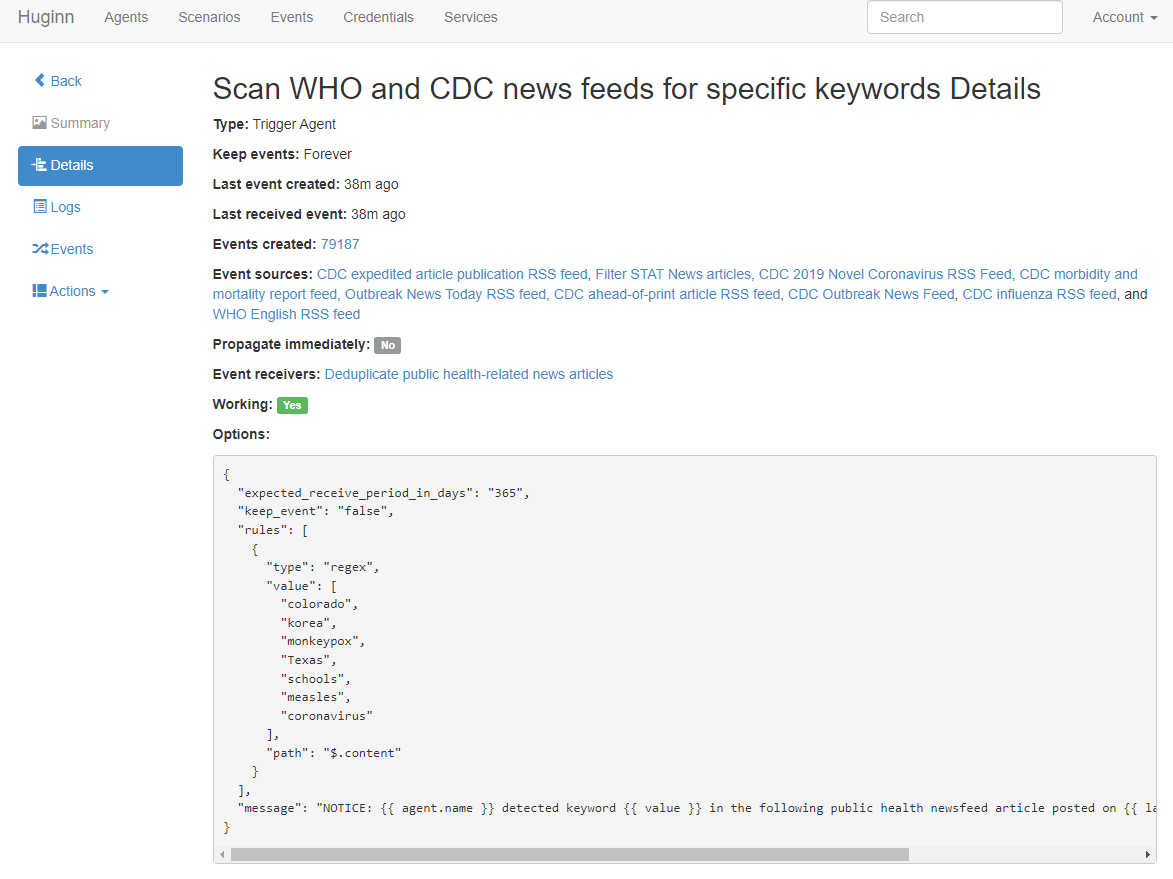
The agent picture above shows how the “trigger agent” is configured. It shows the total number of events created, all the compiled event sources that feed into the agent, and what the agent will receive information from.
Stepping through the options section of the agent, you can see what is being scanned for keywords. This is where you could adjust your interest for topics you are hearing about for the agencies feeds are being monitored for. My Keywords included items like Colorado (where I live), Coronavirus, Monkeypox, and schools. To edit for yourself, click the actions button on the right menu column and select edit. Remove or add your preferred keywords.
Who would’ve thought you could do so much! The earthquake bot is my favorite. Awesome post!