Openmediavault (OMV) is network attached storage (NAS) solution based on Debian Linux.![]() According to OMV (OpenMediaVault.org, 2021), It contains services like SSH, (S)FTP, SMB/CIFS, DAAP media server, RSync, BitTorrent client and many more. Thanks to the modular design of the framework it can be enhanced via plugins (homepage openmediavault.org).
According to OMV (OpenMediaVault.org, 2021), It contains services like SSH, (S)FTP, SMB/CIFS, DAAP media server, RSync, BitTorrent client and many more. Thanks to the modular design of the framework it can be enhanced via plugins (homepage openmediavault.org).
I was looking for a solution when my Buffalo NAS crashed, and needed something affordable until I decided on a new solution to invest in. Instead, I am going to keep it. I installed my recovered hard drives and with OMV Extras I installed docker and portainer and started managing my applications from the program running on a Raspberry Pi 4. I kept thinking it would be temporary until I upgraded to a Synology or equivalent, but instead I will keep it as a permanent device in my network. It is easy to use, back up, and manage. Plus, support from the website, discord, and forums are available everywhere. If you don’t want to run it on a Raspberry PI … then don’t! I have spun this up on an old CPU running Debian 10 and enjoy the extra processing power on my second OMV NAS that is managing my backups of the first.
I am not going to cover all the features here, as your solution requirements are certainly different than mine. However, I will cover easy to follow install, and not any extras I needed to do in the process of setting up a basic NAS with shared folders, permissions, and installation of docker and portainer.
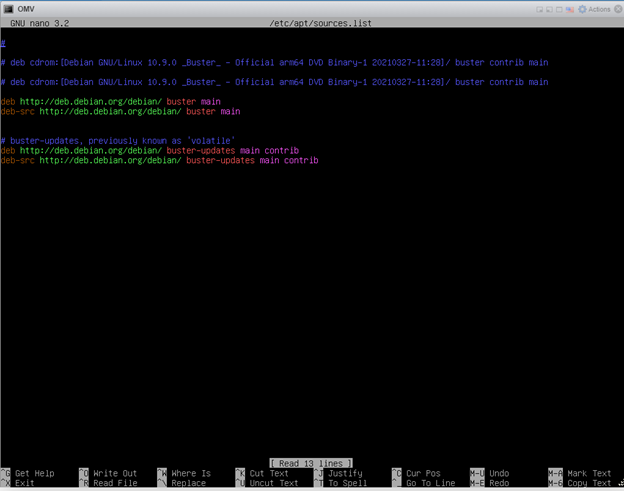 Now that we have our permissions set and our packages are updated, we can install OMV from GitHub:
This will take a while to complete, and you will want to reboot your system when installation is finished.
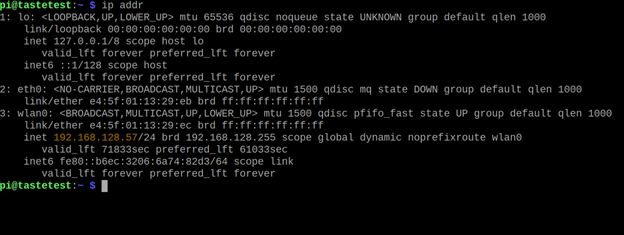
Once rebooted open a browser from a device connected to the same network.
Enter the IP address of the Raspberry Pi you installed OMV on. If you need to locate the IP address of the Raspberry Pi then you can log into the pi and from terminal type:
ip addr
With a browser open to the IP of your device with the new install of OMV you should see the welcome sign in page:
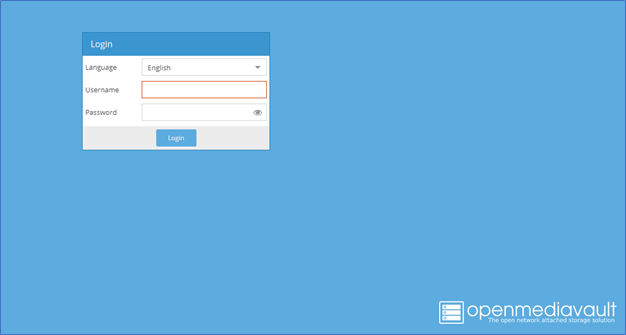
Log in with the default credentials:
un: admin
PW: openmediavault
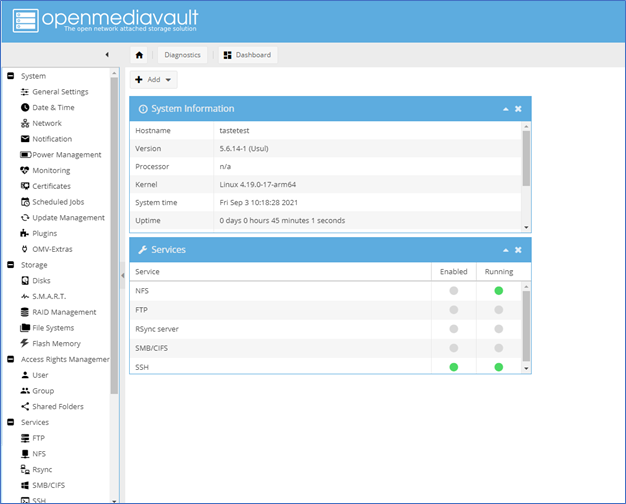
Logged in you will see the OMV Dashboard:
There are some things we want to do right away while we are configuring first use. I am going to put this is list format, feel free to reach out for more details if needed.
Left hand sidebar:
Navigate to general settings
Adjust auto logout to disabled (you can adjust this later if needed for security, but setup is hindered if you are logging in ever 5-30 mins.
Validate that port 80 is the port you want to use. IT may not be if you plan on running a webserver or container with port 80. I changed mine to port 90.
Click Save
In the same section click the tab “Web Administrator Password”
Create new password for admin and confirm it
Click Save and select Apply at the top of the screen in the yellow bar.
Confirm your config change.
If you changed your port, you may get a pop up that an error is occurred. That is because it changed your port from 80 to whatever you selected, and we need to navigate to the port with our browser.
Enter the IP address of the pi again in the browser followed by the port number:
Ex. 192.168.128.133:90 (yours will probably be different)
Adding Storage
If you are like me, part of the point of using a FreeNAS type package like OMV was to share data/media from device you want to share on your network with other devices and/or people. So let’s add that storage.
On the left sidebar menu:
Under the Storage menu click on disks.
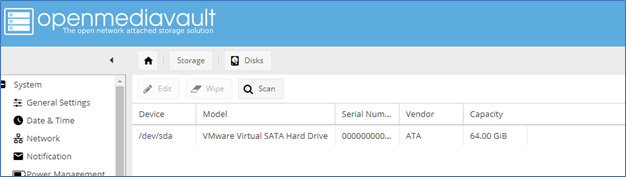
Select the USB hard drive from the list on the right and click the “Wipe” button (new fresh setup)
Confirm the request and when finished select done.
In the same right-hand menu select: File Systems.
Click the “Create” button.
A drop down is the first choice in the new menu. Select your drive and give it a label name (sharedrive, etc.)
You will be asked if you would like to format the device.
Select Yes (keeping the default format populated) and the process will complete
Once complete select “Mount”.
Now save and apply.
In the Left hand side menu under “Access Rights Management” click “Shared Folders”.
Click “Add”
Give the Shared folder a name
Select the shared file system you just created (path should autofill
Permissions should be set to “Everyone: read/write”.
Click “Save”.
Click “Apply” in the yellow bar at the top of the page.
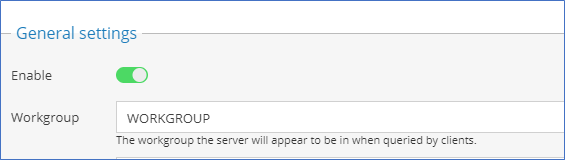
Under the services section on the left hand side menu, you need to determine how you will share your folders on the network. For example, will it be by FTP, NFS RSync, SMB/CIFS? Most common, even recognized by Apple iOS Services is SMB/CFIS. I use SMB/CFIS for my home network and NFS for my virtual machines.
After selecting your share type make sure that the “Enable” option is green. If not, change it.
Keep the workgroup name unchanged as it is default share workgroup for windows.
Click “Save”.
Click “Apply” in the yellow bar at the top of the page.
Click the “Shares” tab next to the “Settings” tab and click “Add”.
Share should read Enabled
Use the dropdown and select your created folder.
The portion that states “Public” needs to be change to “Only guests”.
Click “Save”.
Then click “Apply” in the yellow bar at the top of the page.
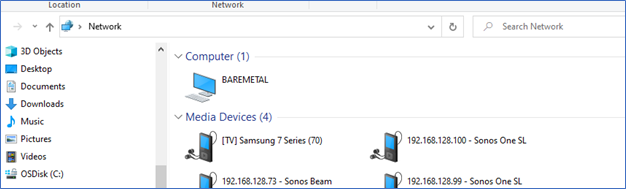
You should be able to see your shares now from a Windows/Mac on the same network. You can test this by going to your file explore and entering the IP address of the OMV device or you can navigate the file explorer window to the “network” selection, and you should see your share listed under the computer section. I named my share drive “BAREMETAL”, and you can see it here:
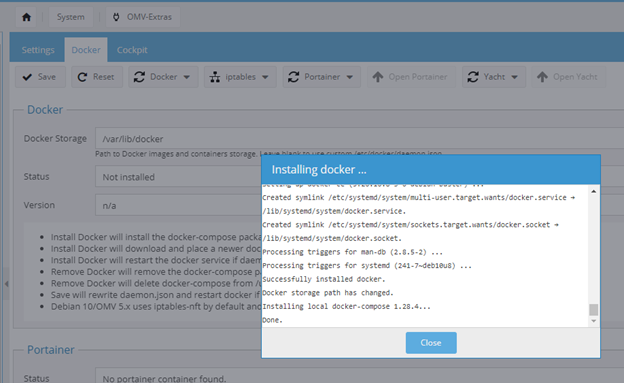
You can do a lot with OMV including using features that many are used to seeing on Synology units. I run different applications and store database and config files to the shared drive. I run the applications in Docker containers and manage them in Portainer (a GUI based container manger). You can easily install Docker and Portainer by navigating the side menu to “System”, “OMV-Extras”, then move to Docker button and select install. Once complete you can also install Portainer.
There are more plug-ins and extras you can explore, but this will give you a good foundation and a working Network Storage Device. There are many more features you can use to connect additional drives, add users, etc. I recommend exploring the different features, installing Docker, Installing Portioner, and consider running applications over the top. A Raspberry Pi has plenty of compute power to run OMV and many applications over the top. I used this as the foundation of my home application server. I will say that you do need to know the limits of how many applications can run at runtime using a Raspberry Pi. I did need to move my WordPress site to another Raspberry Pi as I am running lots of pics and I found with the other applications running at the same time it needed its own space. I do still save my database and config files for WordPress back to the OMV Device though, making my share locations consistent.
This project was inspired and gathered from many of the post written by: