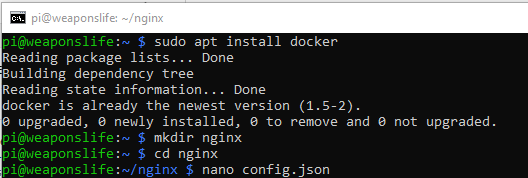
Create a directory and move into it:
I left comments in the docker-compose stack that were useful when I copied it over. Leaving the comments to help understand what the compose stack is doing.
This container’s build shows that the app is:
- Pulling a specific image from Docker Hub
- Using ports 80,81, and 443
- Naming the database host, port, username, and password for the database
- Where it will map volumes to save data.
The container’s build shows that the database is:
- Named db and the same as what the app is calling on
- Identifying the PUID and PGID for authorized users
- Determining time zone and set root password, database name, user, and password
- Mapping the volumes to a config folder
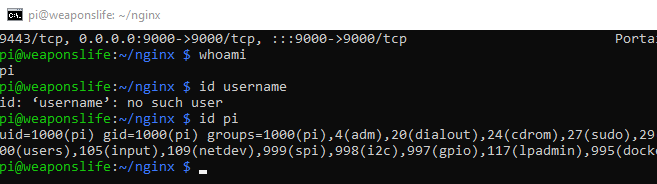
You do not have to use the same MariaDB image I do, but I found that the alpine-mariadb listed above was the only image that consistently worked for me building this on my RaspberryPi. Also, finding your PUID and PGID is very simple. SSH into your NGINX server and type in the command: ‘id username’ (no quotes and the username will be what you used to SSH into the machine). You can also find your username by typing the command: whoami
Now bring the container up:
Now, let us check the status!
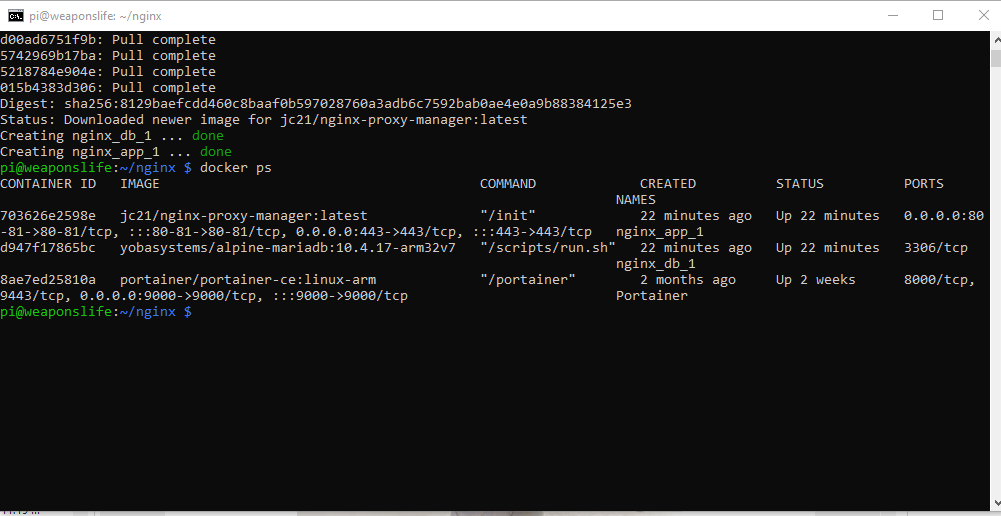
After running the above docker command, you should see the containers and their status. It will list the Container ID, Image Name when the container was created, and even assigned ports.
Now open a browser and navigate to the IP Address assigned to the NGINX server.
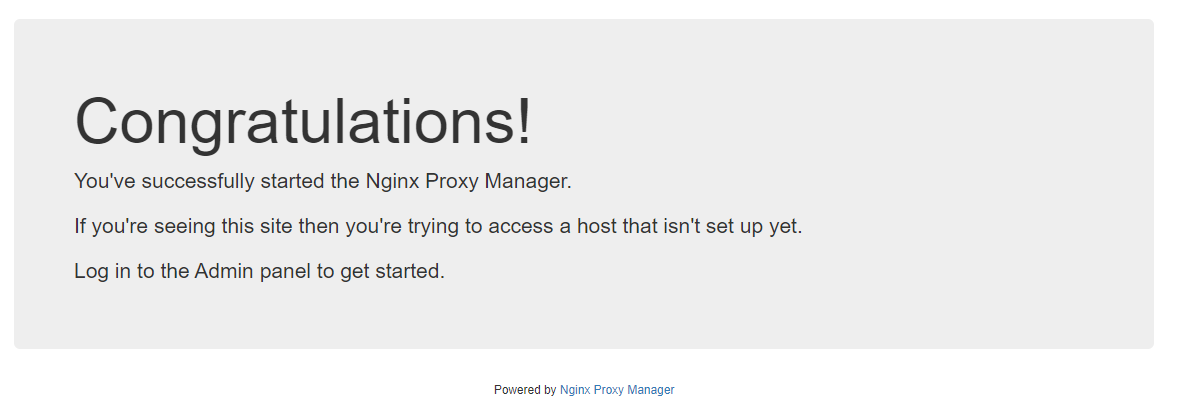
You should route to a screen indicating that NGINX is running. NGINX is now ready to be configured.
Log in by navigating to the admin portal. The portal address is the IP Address of the NGINX server and port 81 (ex. 192.168.128.152:81).
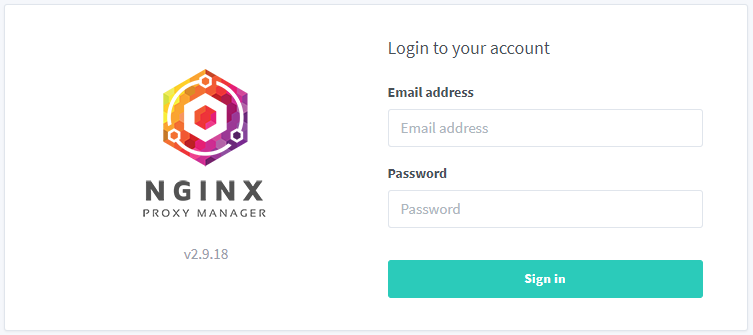
Your default credentials are:
User Name: [email protected]
Password: changeme
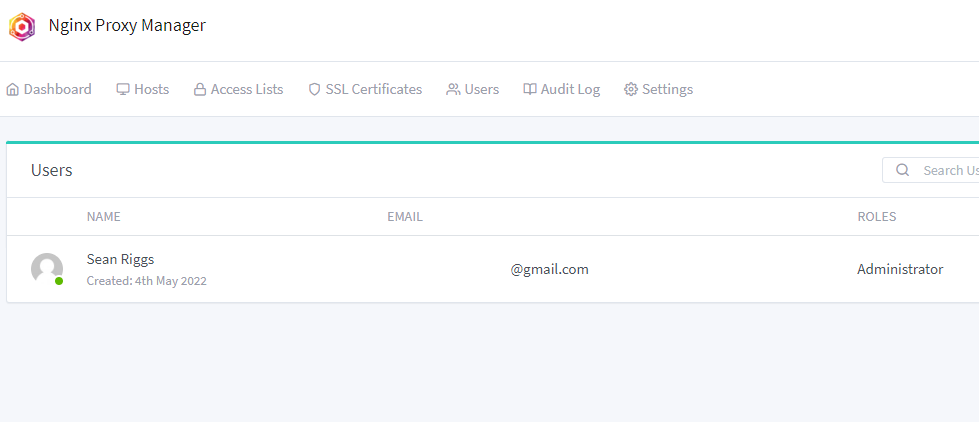
Once logged in, you will get prompted to change your credentials right away; you need to do this. When you change your information, this will take you to the user screen, and now you’re ready to start pointing URLs to your different containers and servers.
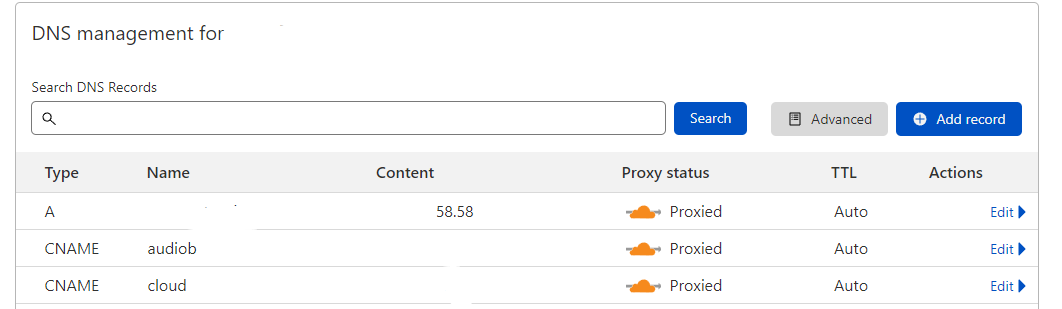
As previously mentioned, I have many different servers and applications hosted on my home network. To access them over the public internet is bought a domain name (CHEAP) and used Cloudflare’s free tier to host my DNS and forward my domain and subdomain traffic to my home.
Gone are the days when you need to have a static IP to do this. Cloudflare has a docker container that will continually update your Cloudflare account with your IP Address should it change (assuming you have a dynamic IP as I do). DuckDNS also offers a similar update process, but it was via a CRON process (which is fine, too).
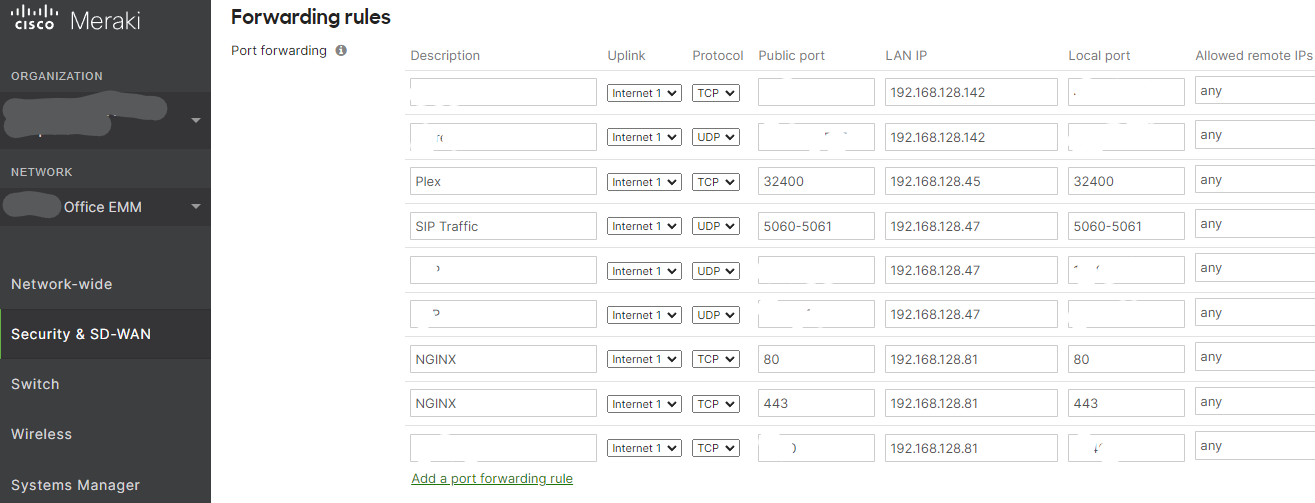
Once you have your domain pointed to your home IP, you will want to ensure you have forwarded all HTTP/HTTPS traffic on your home router to your NGINX server.
Most home internet service providers leave you with the Gateway IP Address and credentials to access your home router. Depending on the manufacturer, your screens and options will be different. You will want to navigate to the firewall or port forwarding section of your router to forward port 80 and port 443 to the internal IP address of your NGINX server. Also, take the time to either ensure your NGINX server has a static IP assignment, or you have set the dynamic IP to a preferred (fixed) IP assignment, as many routers offer today.
Setting up routing with NGNIX is super easy, barely an inconvenience!
Please note that if you are using Cloudflare to host your DNS, you will want to ensure that you turn off proxy IP in Cloudflares DNS management until AFTER you have validated the redirect from your NGINX server. Once traffic is routed as you desire, mask your public IP by enabling proxy IP in Cloudflare once again.
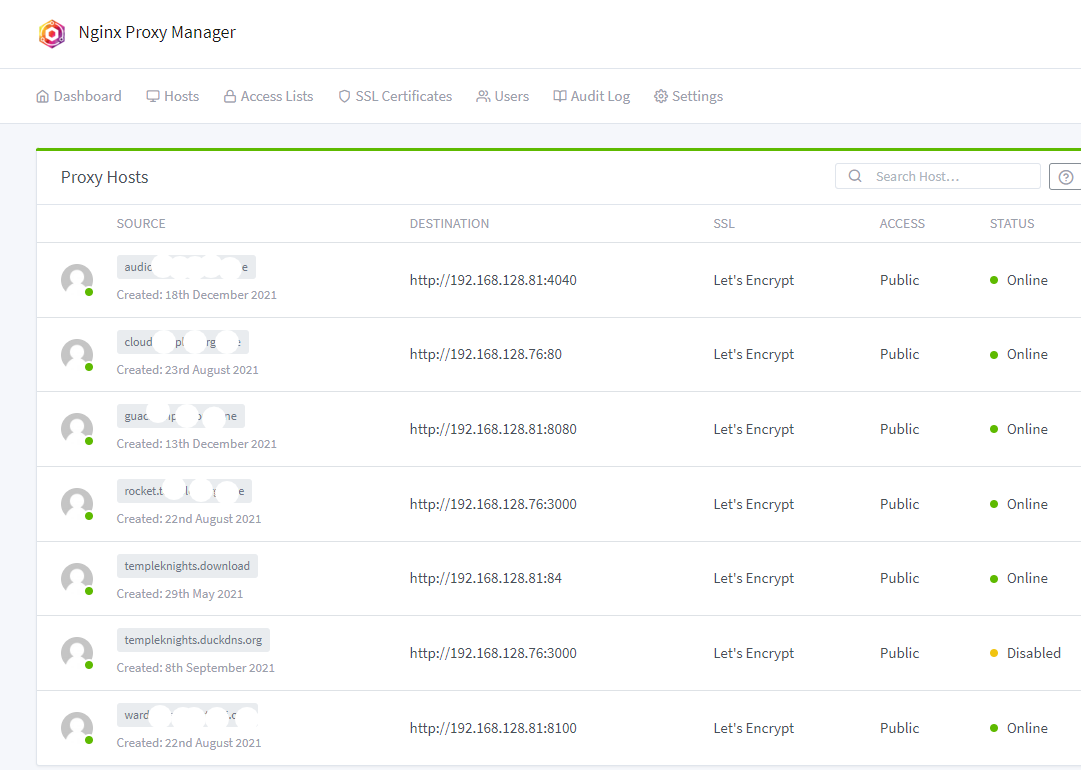
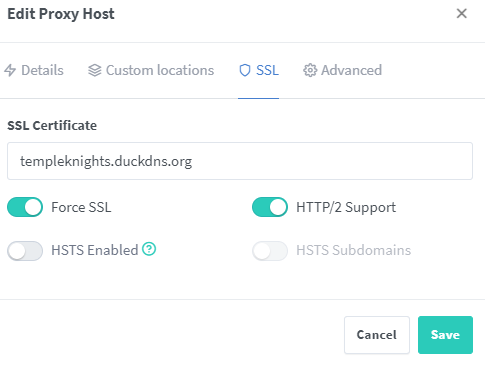
To add a URL to forward to your container or router, select ADD PROXY HOST on the proxy page. This will pop up a window where you will enter the details of the domain name (or subdomain) you want to forward. Enter the domain name, scheme (HTTP), forward hostname (I use IP addresses), the port you want it to go to, and move the slider to “block common exploits.” Before saving, select the SSL shield at the top of the box. Select “request a new SSL Certificate with Let’s Encrypt” in the SSL Certificate box. Slide the force SSL and HTTP/2 Support radials to activate them. Enter an email address for Let’s Encrypt and agree to the Terms of Service, then Save. It may take a min to register, but your redirect and new SSL cert will be active and working.
For those not aware, Let’s Encrypt is a Certificate Authority (CA) that offers SSL certificates that are just as secure as paid certificates but does so at no charge.

 There is not much more to it. Once NGINX is up and running, you almost forget about it until you are adding more applications that you are making available outside your network. NGINX can do much more than just what I have written about here. You can dive in deeper and set up customer 404, authentication for no login applications, and a reverse proxy to support domains on your home network.
As examples, I have included posts below for specific blogs on project applications I host outside my home network.
Great information! I love the step-by-step examples you provided.