Are you starting a new Blog Site, e-commerce site, or another website? Starting the process can be done with little to no cost depending on where you decide to host your site and how much you want to pay for your domain name. However, securing your website, accelerating its performance, and setting up email services can all be done for free! This guide will help you navigate that process and get your site up and running with tips and tricks that level the playing field for performance and security.
Domain Registration - Things to Look For
If you are looking to secure your website and accelerate performance, then I assume you have already purchased a domain name and are either self-hosting your website or using a hosting provider. However, if you are just starting and need a recommendation on where to get your domain name, let me give you a recommendation. You can purchase your domain name from many registrars; I recommend Porkbun. No, I am not sponsored by them, but at the time, they offer more than other registrars included in their domain name pricing, and their fees don’t appear bloated.
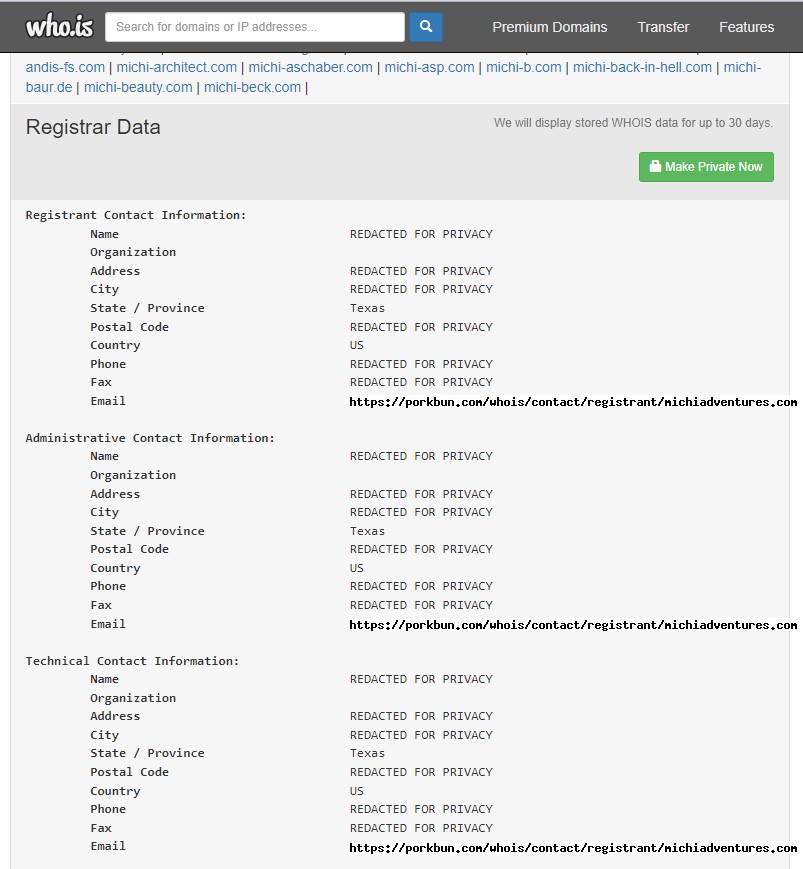
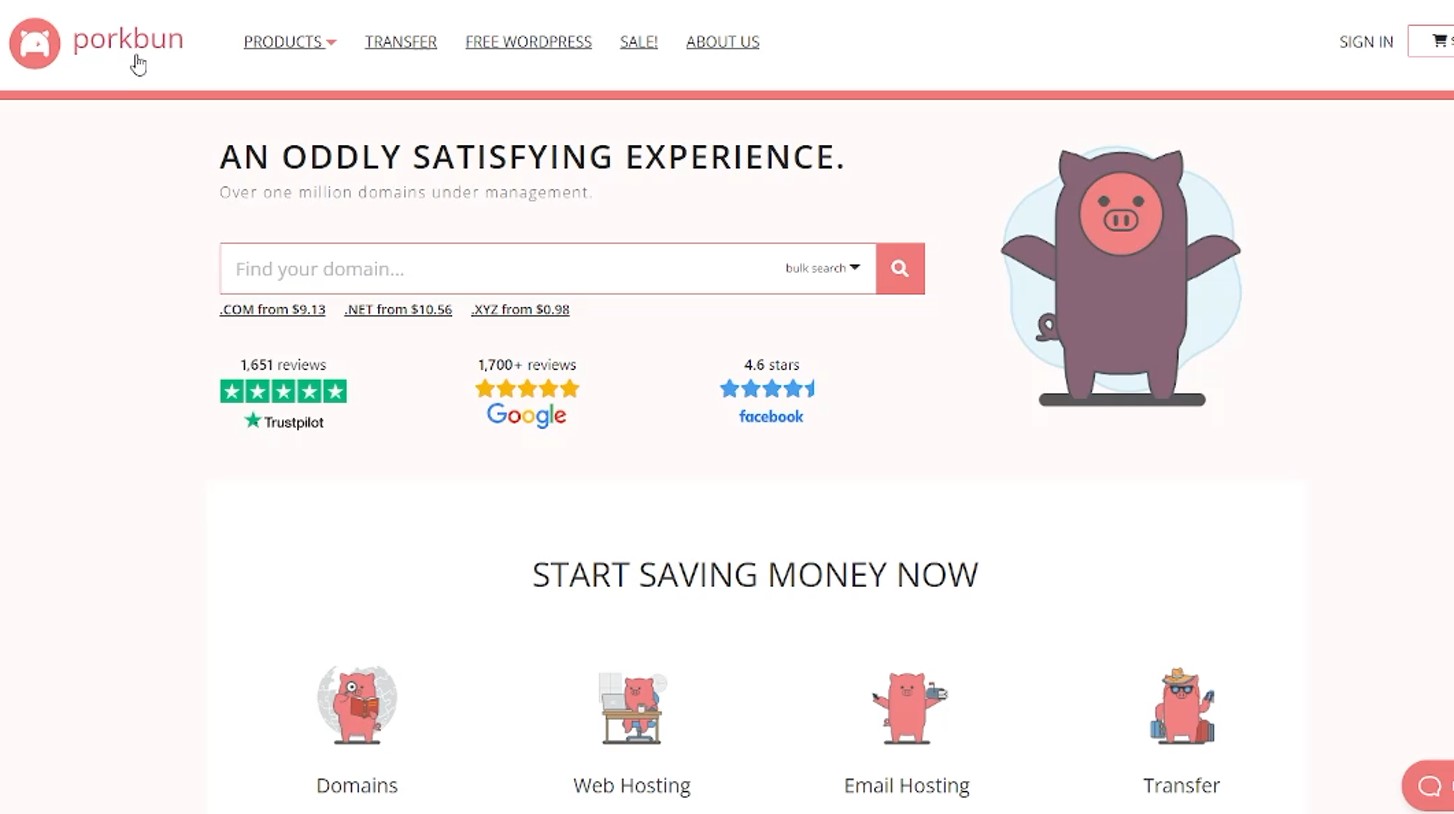 So, why Porkbun? The biggest reason for me is security. I think privacy should be free. When you purchase a domain name, you must provide information that is made available to anyone who performs a records search. Information will typically include your name, address, email, and phone number. Many registrars will offer to privatize that data for you, but at a cost, usually around $10 per year. Apparently, Porkbun thinks privacy should be free, too! Their domain names are sometimes half the costs of other providers, but they include domain privacy and no additional cost! Plus, they also throw in other features some registrars will try and nickel and dime you for, like email forwarding, SSL Certificate, URL forwarding, and free trials on their email hosting and website builder.
Securing your site with Cloudflare
Web Performance and Security is one thing that separates high-dollar websites and hosting services from self-hosted or cheaper – DIY sites. Products and companies like WordPress, Cloudflare, OpenDNS, Yoast, SendinBlue, Akismet, and UpDraftPlus help bring everyday users into enterprise-like spaces and allow personal users access to free tiers that offer performance and security for free. Combining these products further optimizes performance and increases the scope and ability for individual users to play in professional spaces with fast and secure sites/applications.
So why Cloudflare? Just look at what they will do for you … for FREE! Your free tier on Cloudflare will secure and accelerate your personal site utilizing a reverse proxy, their content delivery network (CDN) platform, and DDoS protection. Not to mention, if you have some advanced skills, you can use their free tier for secure internet access to self-hosted applications (WordPress, NextCloud, etc.) for 50 users (VPN – Zero Trust). Want to deploy serverless code for web apps on your site? Yeah, they will do that for you for up to 100K requests daily.
Staying basic, we will just utilize their free tier to set up DNS hosting to secure our site using their proxy service. We will let Cloudflare accelerate performance “automagically” through “lite” use of their CDN platform (site caching).
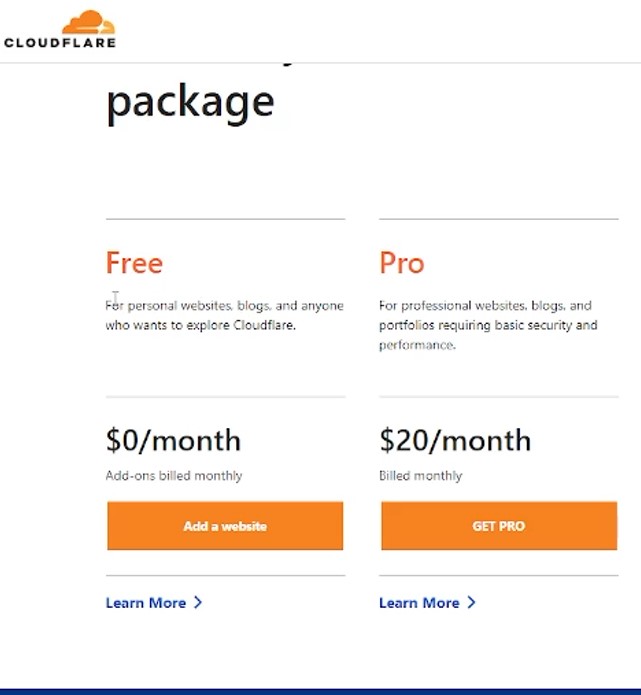
Navigate to cloudflare.com and set up your free account. 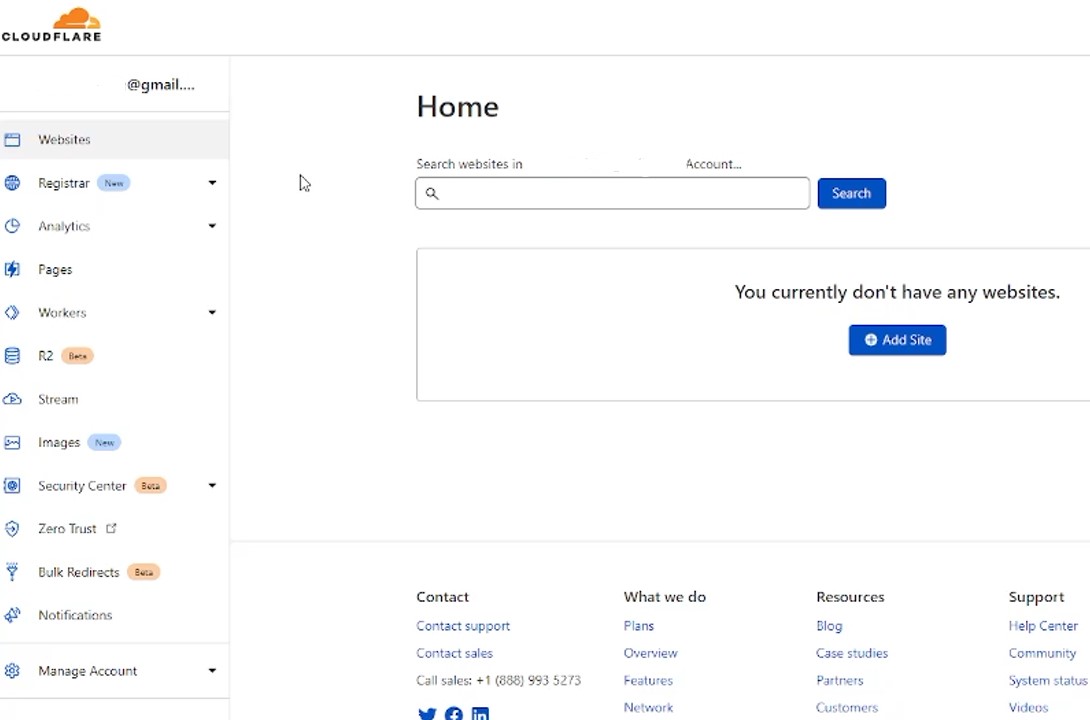 After signing up for an account, you will be brought to your Dashboard, where you will need to add your website (the domain you purchased). Cloudflare will scan for DNS records and then display the DNS records on file for your domain. After adding the site, it will ask you to select a plan. Select the free tier.
Moving DNS Management to Cloudflare and Optimizing
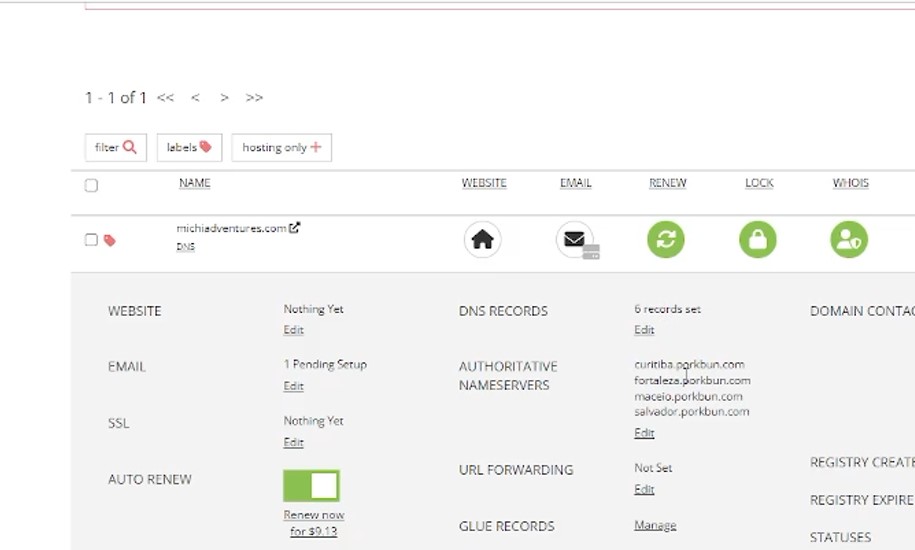
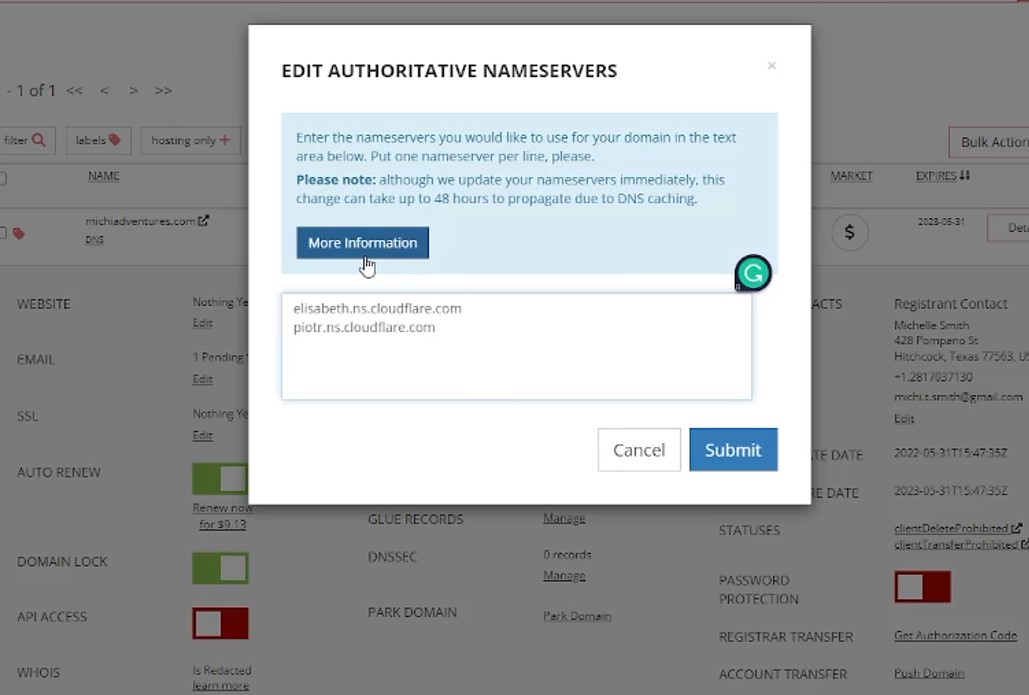
In your DNS settings, you will see an area called authoritative nameservers. Under your DNS Management listing for your site, you will see a box labeled “Cloudflare Nameservers .”Copy all listed nameservers 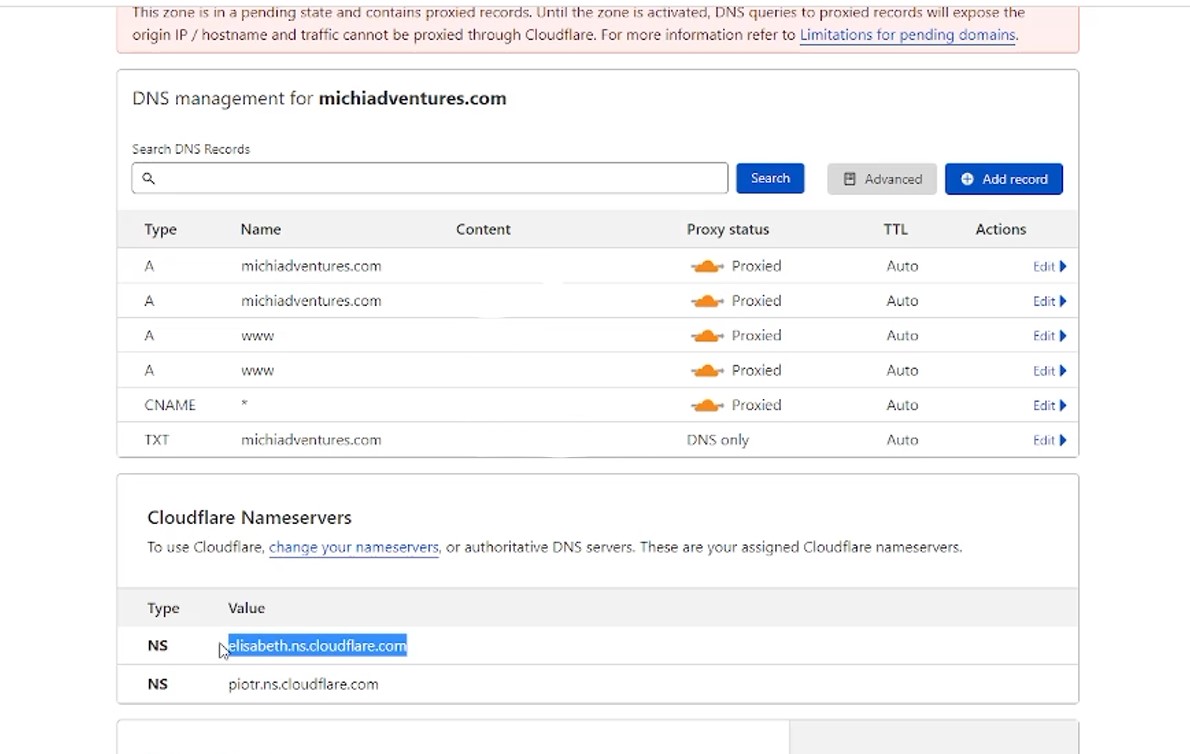 and navigate back to your Porkbun Account (hopefully, you left that open in another tab!) Select Edit and delete the box contents, paste the provided nameservers from Cloudflare, and save.
It is time to recheck Cloudflare and see if your DNS entries have propagated. Some registrars can take up to 24 hours, but Porkbun makes these changes super quick. Move back into your Cloudflare dashboard and navigate to the overview tab on the left-hand sidebar menu.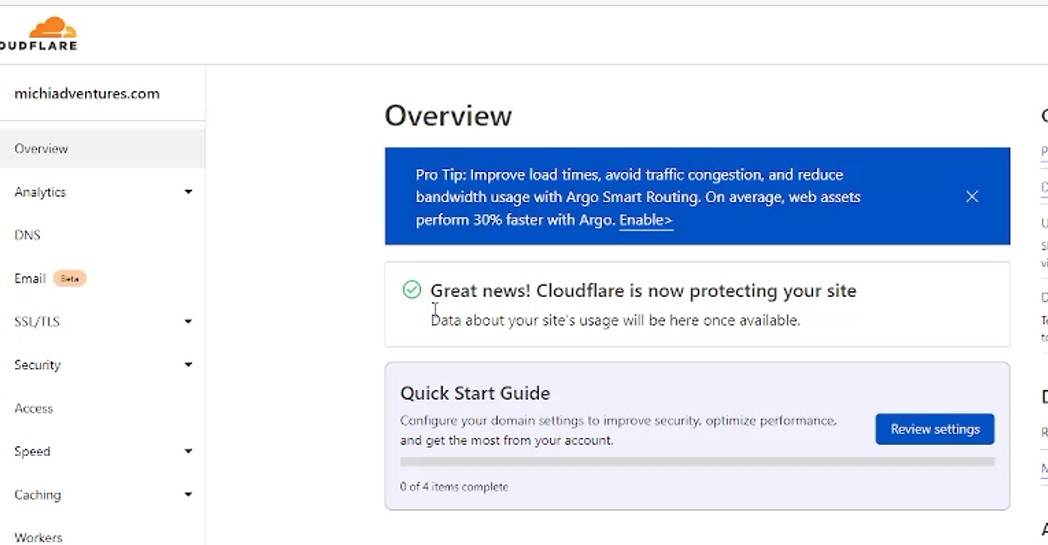
Note: you can use any registrar. My examples are based on service with Porkbun, but your other DNS Registrars should have a similar, simple process to update custom name servers.
Now select the quickstart guide review settings button. Keep Automatic HTTPS rewrites (save), enable “Always Use HTTPS” (save), do not enable auto minify, enable Brotli (speeds up HTTPS traffic via compression), and finish.
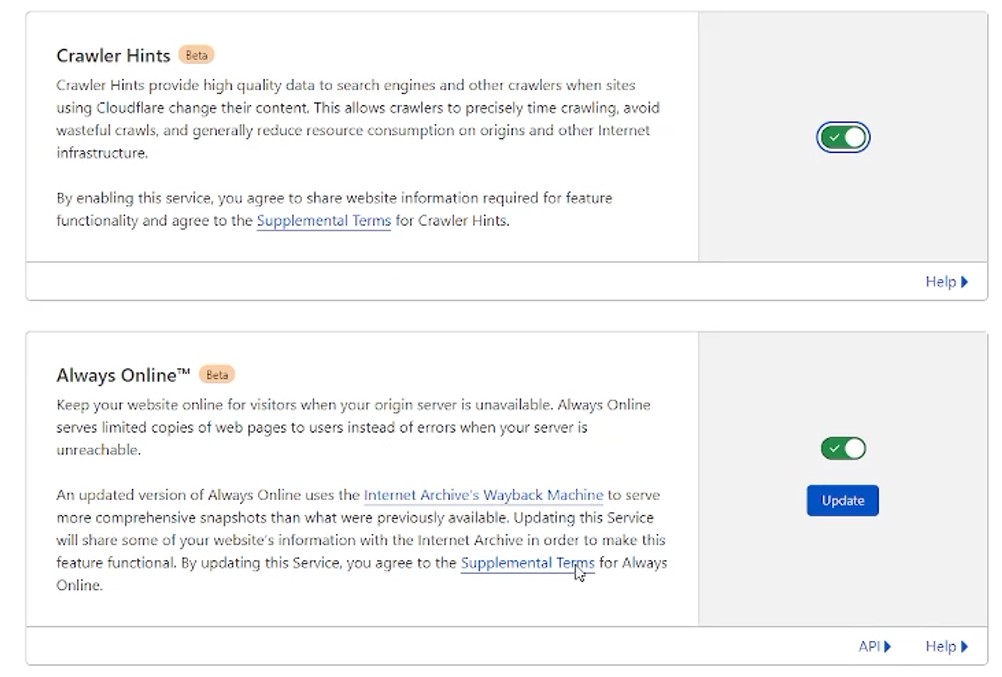
We will now move to the caching section. Scroll down the options to Crowler Hints and enable the feature. Do the same with Always online.
These features will help set up security and performance for basic users.
Securing your Domain from Cloudflare to your Hosting Provider
You can host your site anywhere or even self-host your website or application (WordPress). I am actually doing both. I am self-hosting via a RaspberryPi running Docker containers for NGINX, WordPress, and Cloudflare DDNS (to update Cloudflare if my dynamic IP changes). I am also hosting a site on Namecheap’s EasyWP application. If you’re interested, you can find them at namecheap.com. However, it doesn’t matter where it is hosting; we just need to be able to tell Cloudflare where to send traffic that is sent to your domain name. If you are self-hosting, this is probably your IP Address; if you host it somewhere, they will give you an IP to point traffic to or an ingress address (.com) that you will update Cloudflare with a CNAME record.
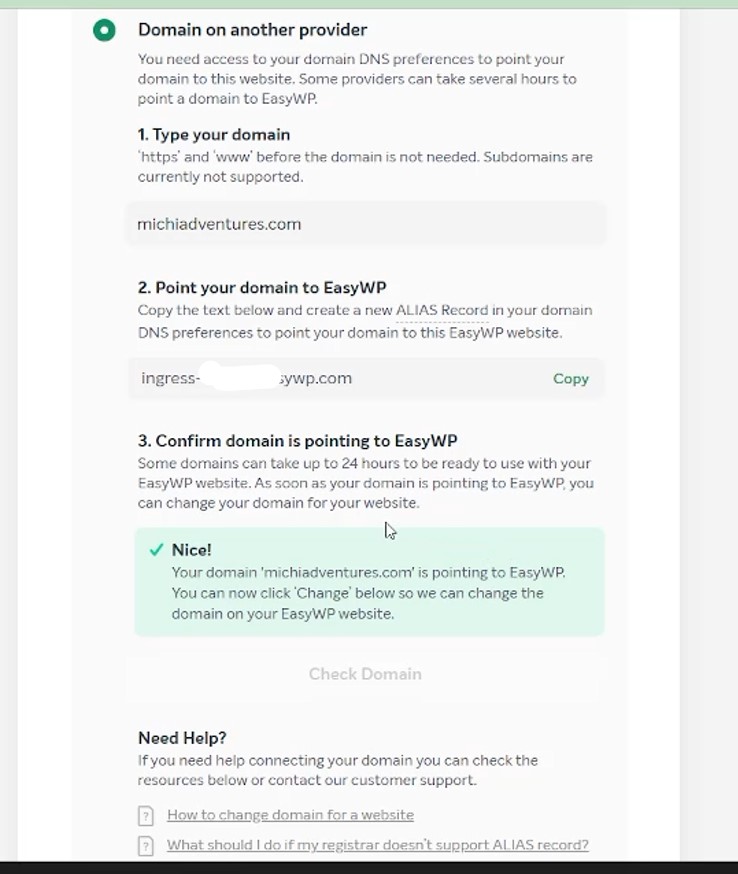
For example, you can see with Namecheap that they have you validate your domain name and then ask you to point your domain to an ingress.com address.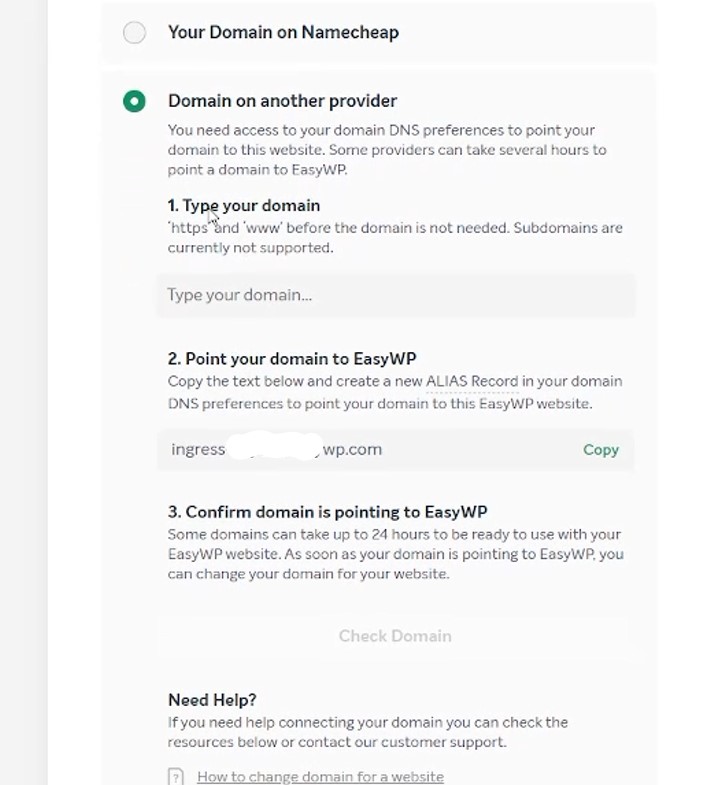
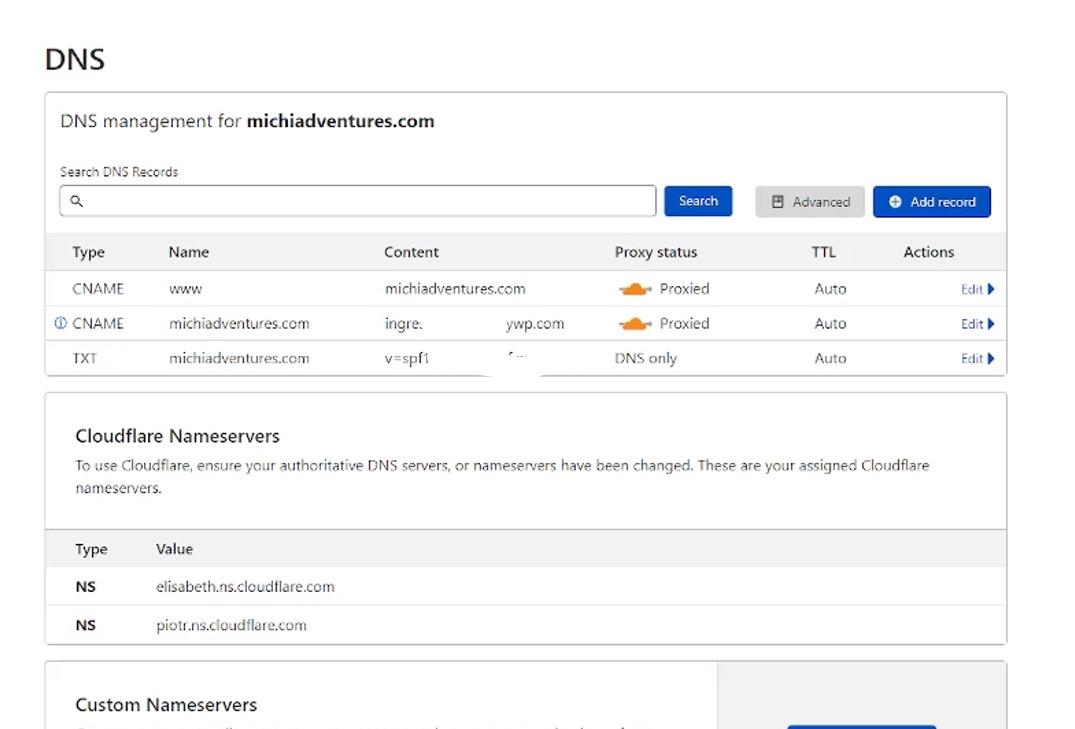
Copy the address your hosting service provides you and navigate back to your Cloudflare DNS Management tab. Edit and delete all the records under the DNS management tab except for the TXT record. Then add a new CNAME record with your website domain name and hosting service address for your site. You then will create another CNAME record and will populate the name with “www” and use your domain name as the content (see pic)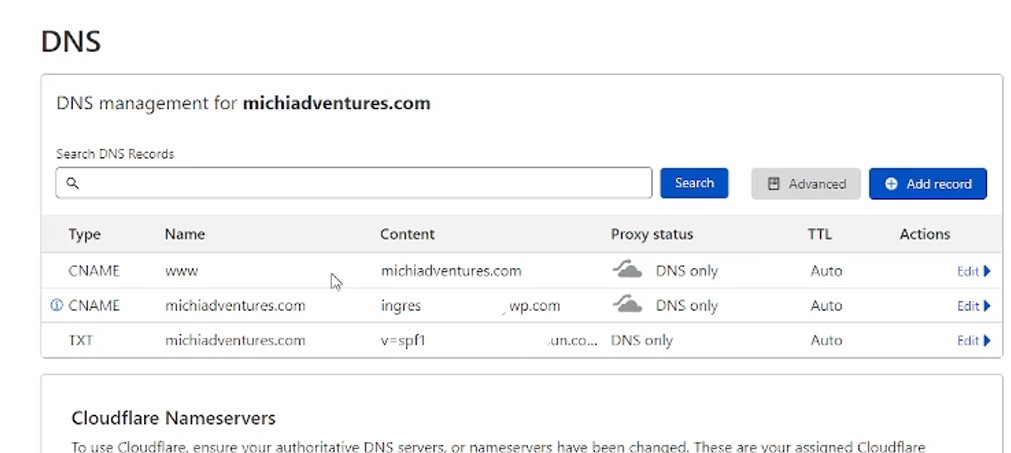
On both of these new names, you will see the option to “proxy” or use “DNS” only for proxy status and also configuration for TTL. Leave TTL to “Auto,” but we want you to temporarily set your poxy status to “DNS only.” This will allow your hosting provider to validate the DNS is pointed correctly to their hosting platform.
Switch back to your hosting provider and perform any site validation needed.
Now navigate to Cloudflare, and under the DNS Management tab, edit both CNAME records to show Proxied for Proxy Status. Secured Again!
Sending and Receiving Emails from your Custom Domain Name
Making your site have that enterprise-like clout requires what some would think of as premium features like a custom email domain (ex. [email protected]). Setting up this feature takes a little extra work, but it’s super easy, integrates into Gmail or Outlook, and works like a charm. New features and expanding support from multiple vendors have made this a regular feature for regular users.
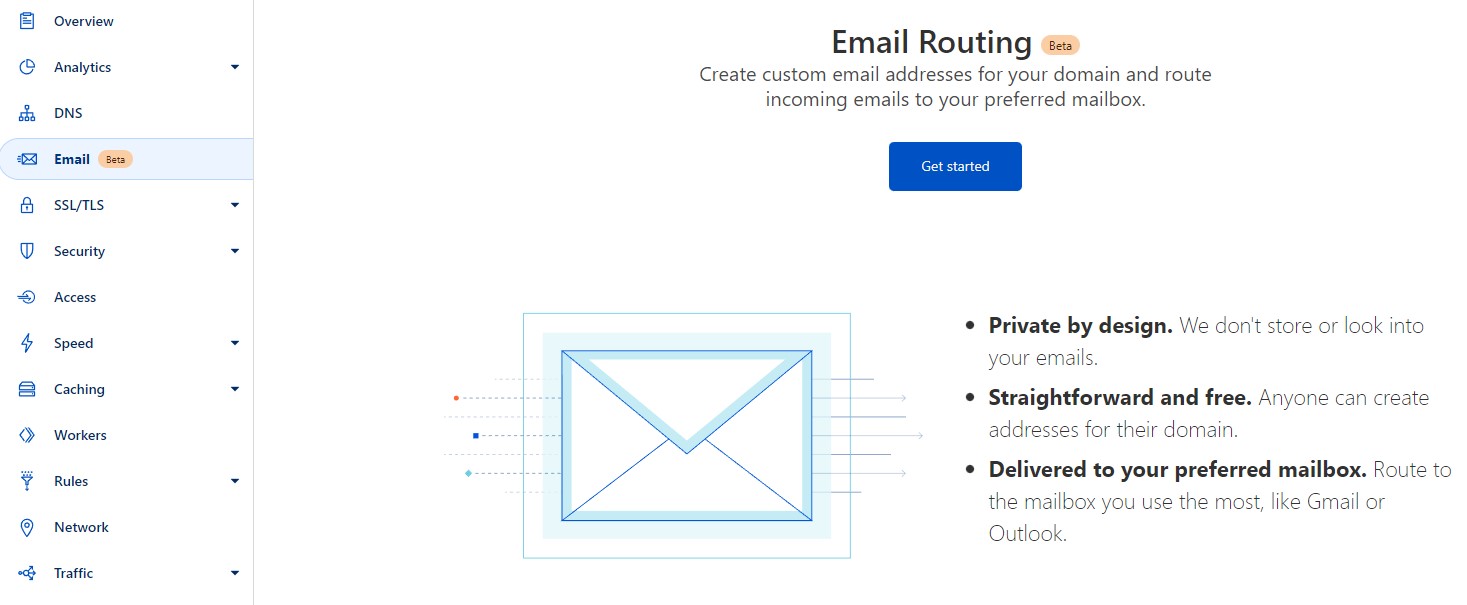
To utilize this free private email forwarding service, navigate to your Cloudflare account. Login to the domain you want to manage and select email from the sidebar menu. This is free for everyone and will handle all your inbound emails to this customer domain address. Click the get started button.
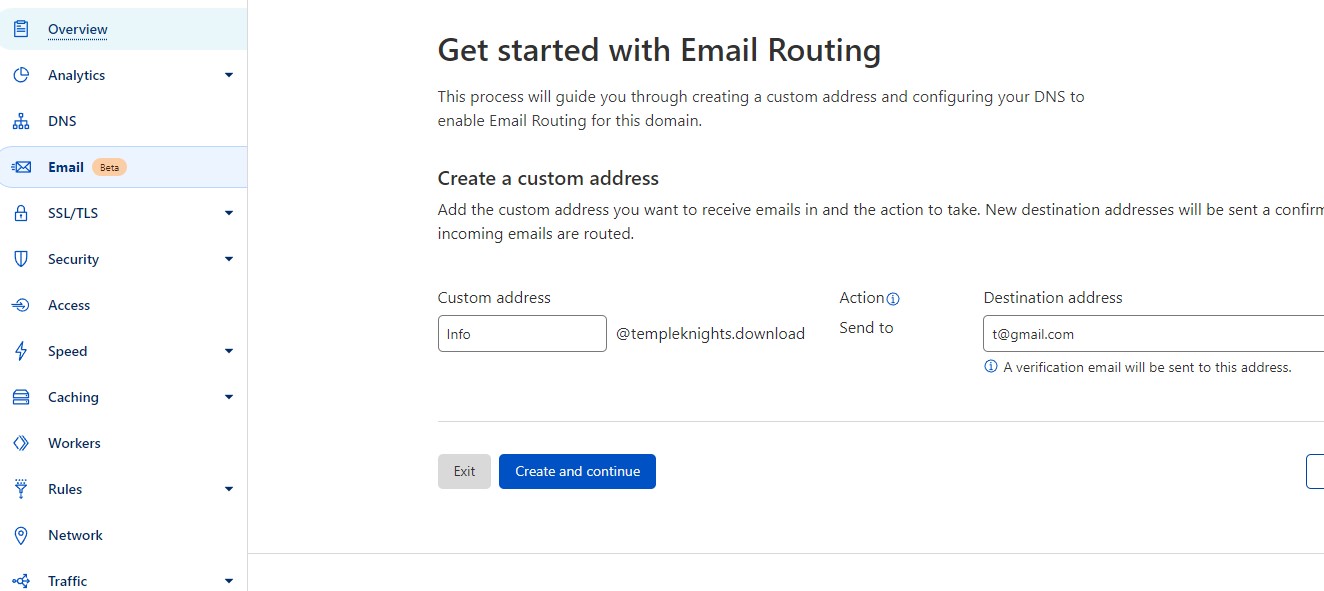
On the next screen, you can input the custom email you want to add (ex. info@ or support@ or [email protected], etc..). Enter your desired custom address and send to destination, like your Gmail, Outlook, or other provider email address. Then click the create and continue button. I will be using Gmail.
Cloudflare will send you a verification email; you will need to follow the instructions on that email and validate your account.
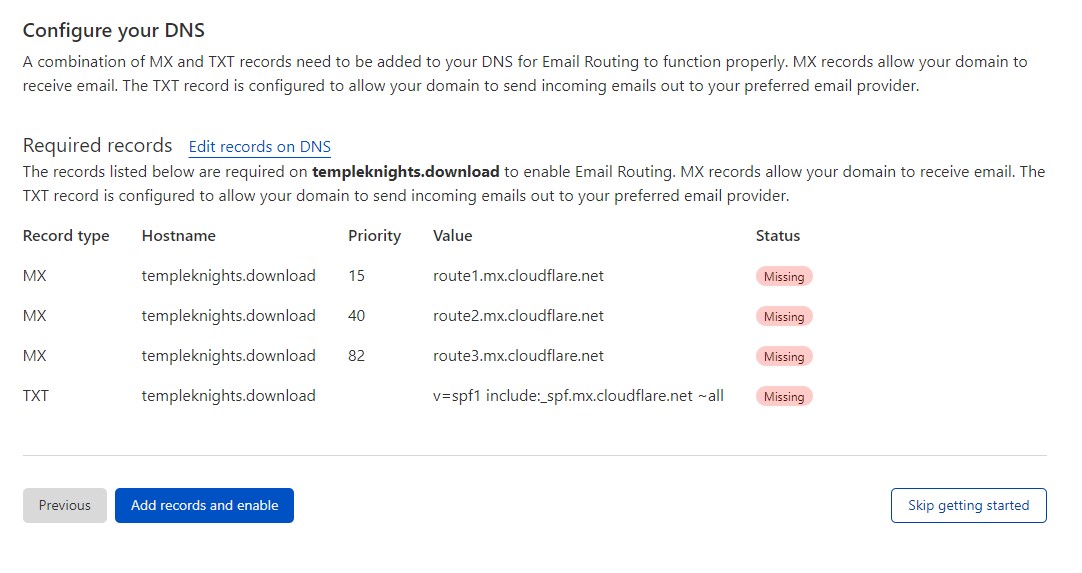
Now you will need to configure your Cloudflare DNS records to tell them how to handle your inbound emails to your custom address. This is not a difficult task; Cloudflare provides step-by-step instructions on what type of records to delete and what kind to add.
Once you add the required DNS records or delete them, you can click the button that says finish. You will get a confirmation screen, and you can test out your new email connection (for receiving). You can receive unlimited incoming emails through this setup at no cost.
Now it’s time to set up outgoing email. With confirmation that you can receive email from your custom email domain, how about sending! We can do that too! However, we won’t be doing this through Cloudflare but through another vendor’s free tier service. This will be done through Sendinblue.
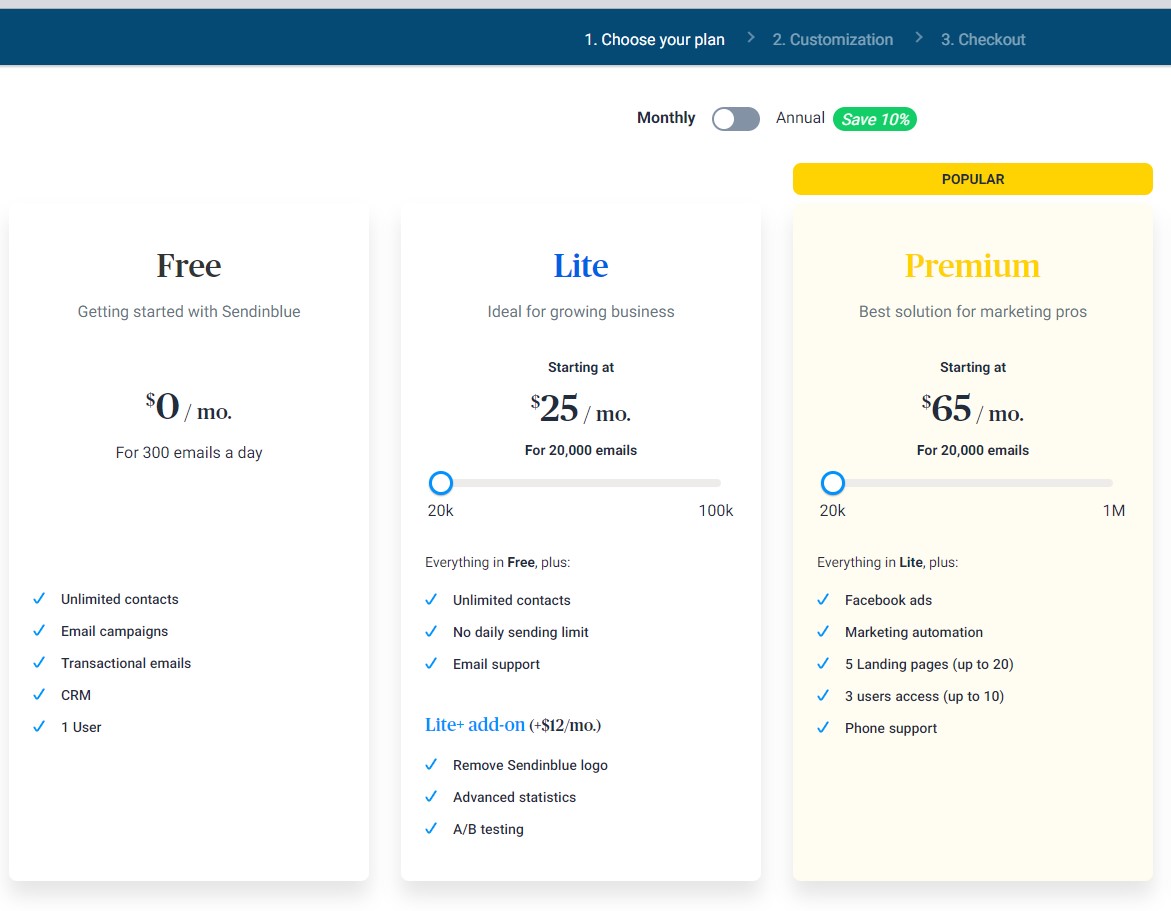
Why SendinBlue? Because it gives us 300 free outgoing emails a day! And if we get super busy, we can upgrade easily from the free tier to an affordable email plan, and by the time we send out 300 emails a day, it should be worth the upgrade!
Using your favorite web browser, navigate to sendinblue.com. In the upper right corner of the website, you should see a sign-up free button; click that. This will take you to a sign-up form where you must validate your email address and enter personal information about yourself and your site. Complete this action, and the site will ask you to pick a plan. Select the free tier.
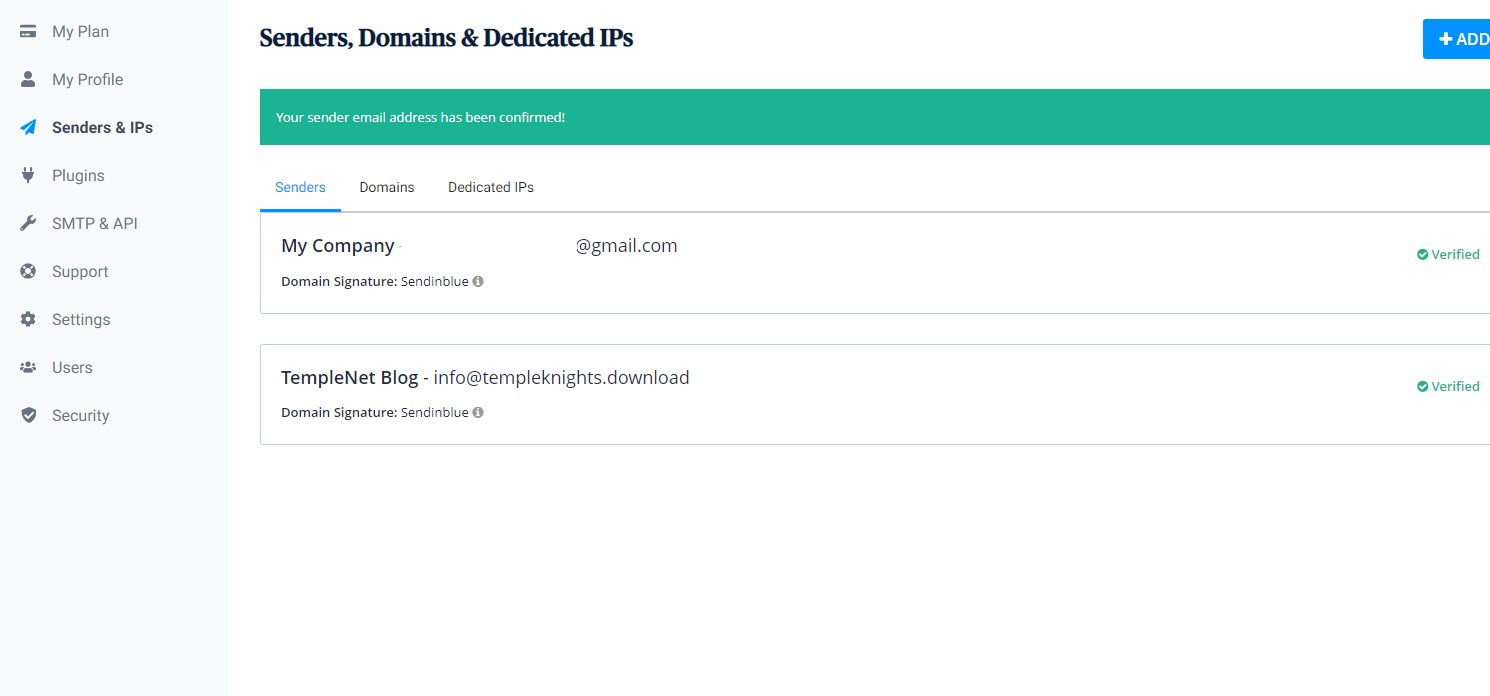
Now navigate to your account drop-down list and select the Senders and IP menu item. 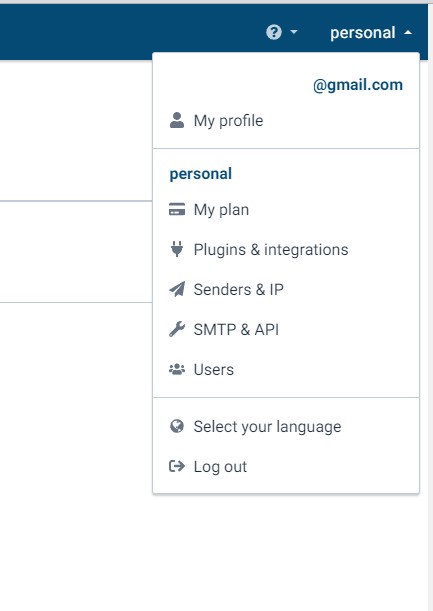 Here you will add the name you would like it to come from (Support, your name, etc.) and enter the email address you set up for your domain as the sending from location. Save your input, and sendinblue will send you an email verification to “activate your sender address.” Follow the instructions to validate the request, and it should show your new address as verified.
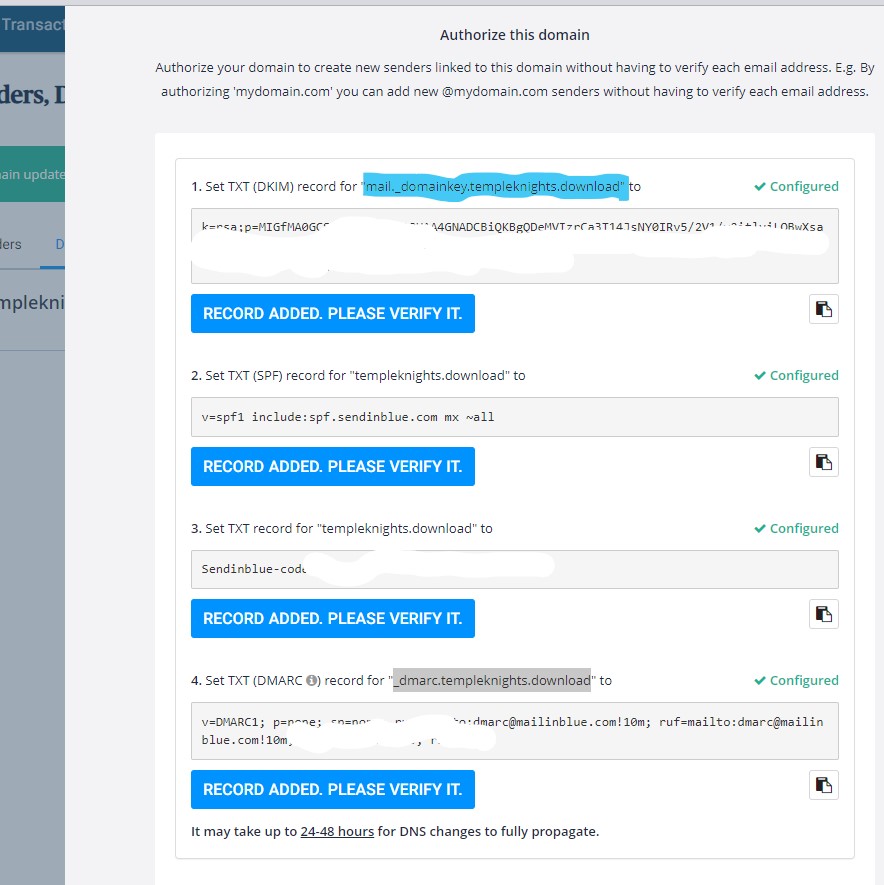
Now we want to add your domain. Click the domain tab and add your domain name and check the box that says you would like to use the domain name to digitally sign emails. After adding your domain, sendinblue will pop a screen asking you to authorize the domain. It provides the records you must add to Cloudflare to allow email sending. Pay close attention to the record hostname that you will be adding. Copy-paste the necessary data from each block record (see note below regarding the TXT SPF record) into Cloudflare and click the “record added please verify it” button to ensure it was input correctly.
Please NOTE that you will be editing the SPF record already in place on the Cloudflare DNS site when adding the TXT record for the SPF record. Your SPF record should look like the included pictured below.
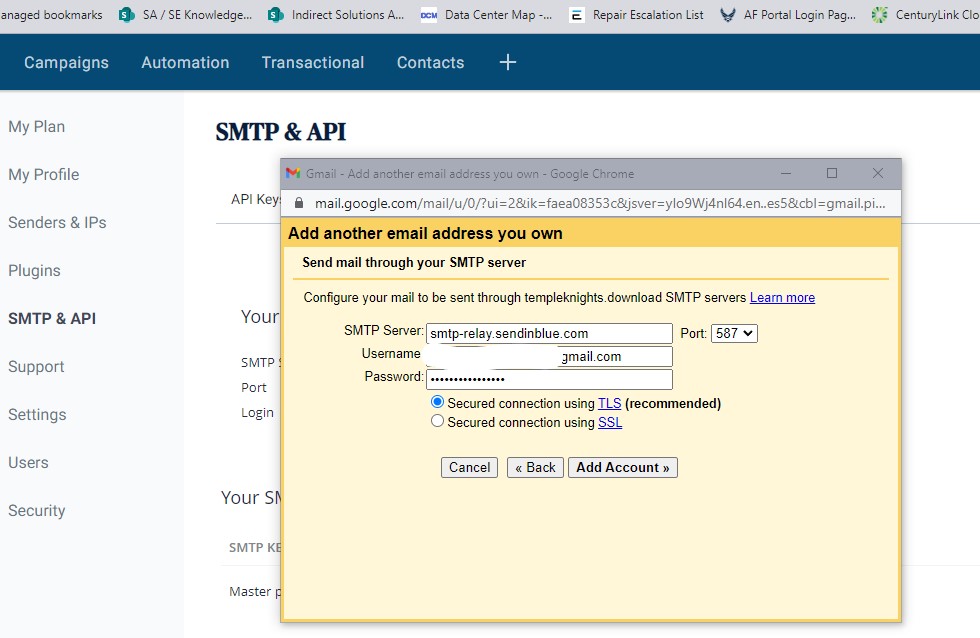
See, that was easy! We need to integrate this with Gmail so you can send and receive it from your Gmail account. Log into your Gmail account and go to “see all settings.” Under the accounts and imports tab, go to the “send email as” section. 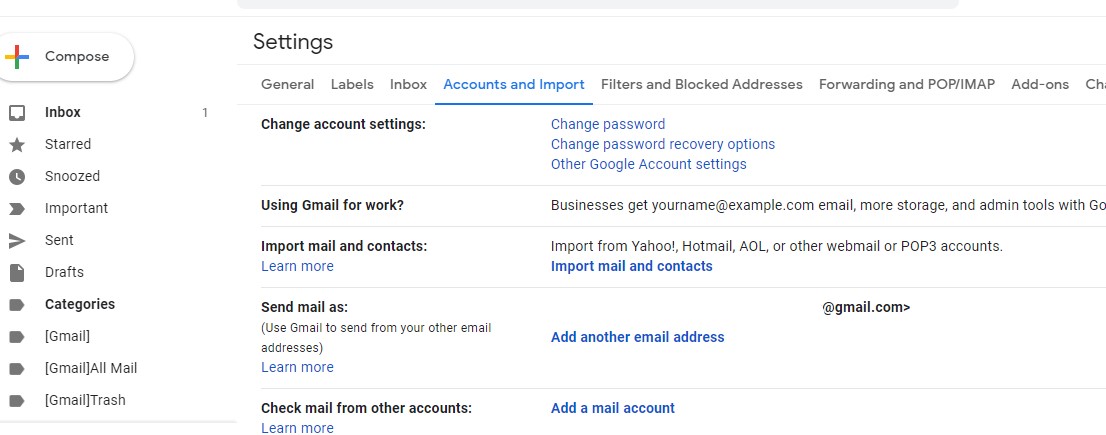 Click the add another email link. input your information (same as you did at sendinblue), and uncheck the box that says “treat as an alias.” another window will pop up asking for server information. After creating a new SMTP key, you will find this information under SMTP & API in your Sendinblue account. Use the new password provided and add that to the Gmail setup screen. Like an API Key, the new SMTP password is only shown once, so save it somewhere. If you need it and close the window without copying, you must deactivate your created key and create a new SMTP key. This is not a big deal and a quick step, but saving the key is much better than repeatedly creating a new one every time you need it.
Now attempt to send an email. You should be able to compose an email and in the “from” section of your email, drop down to see available sending from options and select your custom email account. Write a test message and send it. It may take a minute to receive your first email, but you are probably good to go if you don’t get an error. In your all settings screen in Gmail, validate under accounts and imports, then your “send email as” section has the radial button “Reply from the same address the message was sent to” checked. This will ensure when you respond to an email, it comes from the account that received the message.
Most people like setting up an email address for their domain to communicate with new subscribers and send out newsletters or post notifications. This is what sendinblue was made for, email campaigns. If you’re using WordPress, add the sendinblue plugin and create your templates and automation. This setup is easy but is definitely a topic for another post. I found the process straightforward, but I will also put together a quick how-to on this if requested
